Sunday, December 2, 2012

PBD Challenge: Sketch

I know I've said it before, but sketches are not for me.  Haha, I get so nervous with them trying to get them to work for me.  But I just have to keep reminding myself that it's okay that I don't follow the sketch exactly. This was the sketch for PBD's latest challenge.


I just quickly put a card together just now because I had busy week of work.  It was the week of parent teacher conferences!  Thankfully, they went well.  I keep in contact with many of the parents throughout the school year via email (so grateful that I don't have to spend time calling parents like I did my first year before I asked if I could email instead!), so it's never a surprise when I speak to parents.  It was tiring nonetheless!  Staying at school all day on Thursday is rather draining.  

I thought I'd put this card together yesterday, but Howard and I were preparing for the bake sale at my church and putting those together.  I'll probably write a separate post about that soon, but the cards made $224 for the mission funds!  Yay!  Since I'm on a crafty high, I figured I'd try out this sketch challenge especially with the encouragement and reminder from Melisa.


I simplified the sketch by only using one piece of patterned paper.  I just had to make a mushy card since a few people mentioned anniversary cards and "I love you" cards at the bake sale today (things I didn't make this year since last year I made too many and people wanted birthday cards instead!).  I especially wanted to make this card because I haven't yet used the "To The Moon" set I purchased a while ago.  It is definitely a great set for me to make cards for my hubs, Mr. LoveandSushi!  I have to say I love the mixing of the fonts in the sentiment.  Lastly, the pink and green were chosen because they're our colors, of course!  If you've been following my blog for a while, that fact is pretty well known!

I'm curious to see what next week's challenge is too!  I just enjoy the PBD challenges so much because normally I craft to mass produce.  These give me a reason to just craft for the sake of crafting!

Sunday, November 18, 2012

PBD Challenge: Favorite Pattern


Oh boy, the last time I posted was for the Pink by Design Challenge, and it was after dealing with an illness that landed me a trip to the hospital along with Hurricane Sandy.  Now that I'm posting again for the next challenge, I have another story to tell about a car accident that my whole family was in due to an 18-year old girl smashing into us while we were on our way out to celebrate my mom's birthday.  I don't really want to get into it right now because I'm still dealing with it physically and emotionally.  Praise God that we all walked out of that car relatively unscathed.  A bunch of us got checked out at the hospital.  We have bad pain in our backs and in our necks.  I also have a big bump on my head and a scalp laceration.  But like I said, we may be hurting, but we're all okay and will recover after some time.

Moving on to more positive things!  The current challenge was to create a project using a favorite pattern.  Strangely, my favorite pattern to use when crafting is plaid!  Haha.  The reason for that is because even though I like polka dots, it doesn't always work with all cuts or images because it depends on the size of the dots.  Then I thought about stripes, but they really bother me when it doesn't line up properly with the base of my card.  It's very easy to see what's crooked on paper that's striped!  Then I realized I use plaid often because it's easier to work with AND because it reminds me of my dad and my husband!  Haha, my dad used to (and still does, if I think about it) wear plaid collared shirts all the time when I was a kid.  It was like, the thing to do.  My husband has a few plaid shirts that he wears too.  Any shirt I see though always brings me back to my dad!


I used Create a Critter for the cute apple.  The sentiment "Smile" comes from Pink by Design's set called "Scripted Year" that I use rather often because I just love the font.  I had to pop up the apple a little, of course.


I really like how the green plaid paper looks even though the leaves on the apple are green too.  I am really trying to use more of my patterned paper because I think it really does make a card stand out.  I don't have much else to write about this card since I'm utterly EXHAUSTED.  I like that I was able to craft a bit today though just so that I could distract myself from the millions of thoughts going on in my mind.  I am grateful that we only have 2.5 days of school this week before Thanksgiving break.  We all need some rest!

Monday, November 12, 2012

PBD Challenge: Shades of Autumn

Yes, I have been rather absent from my blog!  It doesn't mean I'm not crafting though.  I have been making cards for my church's bake sale that was postponed to the first Sunday in December due to Hurricane Sandy.  The storms we've had lately and the sickness I've dealt with is a whole other story, but right now, I want to focus on the really quick card I made for Pink by Design's recent challenge, which was a color theme based on this palette.


As pretty as autumnal cards can be, I didn't really think I could make a card with these colors since I don't have paper that matches it.  Just an hour or so ago, however, I decided to take a look because I needed a quick break from my school responsibilities and apartment chores since I'm home today for Veteran's Day.  I ended up finding a floral pattern with colors that definitely reminded me of this fall season (even though it seems like winter what with the Nor'easter we just had!).


I'm trying to go back to the CAS (clean and simple) style that I really like that showcase the pattern paper itself.  I end up pinning a lot of these types of projects on my Pinterest board, but I don't make them often.  I figured this was the perfect opportunity since I didn't want anything competing with those colors.


The PBD sentiment is from the set called "Friends to the End."  I added the rhinestones just to add another element of 3 to the card.  As simple as it is, I like that I was actually able to find a use for the paper!

Thursday, October 4, 2012

Master Crafter Challenge


Married life and teaching life don't leave me much time to have a crafting life.  However, back at the end of August, Sarah Hamer of Pink by Design announced a fun challenge to determine who would be a Master Crafter!  The morning of the announcement 99 people and I ordered a Master Crafter box filled with mystery items.  Once we received our boxes, we had a good amount of time to make a project that would be linked up on October 4th for voting until October 11.

I was a little bit nervous to receive the box because I'm not necessarily the most creative when it comes to challenges.  However, I was also extremely excited because challenges force me to do different things that I normally wouldn't do.  I thought back on Pink by Design's 2-year anniversary celebration with the entire day full of challenges that I absolutely enjoyed as it stretched my crafting skills.  I knew this would be another opportunity to think outside of the box (or think ... IN the box?  OF a box?  Haha ...)

These were the items inside the boxes:
- Scissor Mouse sponsored by Westcott
- DCWV Rockstar mat stack sponsored by DCWV Deals
- Cotton Bag Sponsored by State line Bag Co.
- 1/2 sheet of Rhinestones sponsored by Queen & Co.
- Sentiment stamp sponsored by Pink by Design
- 2 assorted buttons

I struggled with what to make because I was actually thrown off by the Rockstar mat stack.  The patterns and colors in the stack are not the typical colors I use.  But, of course, that made it so much fun because it was definitely something I never would have bought and used on my own!  It had to be a challenge, right?  With only about 10 hours until the linking time, I still hadn't figured out what I was going to do.  I did know that I wanted to do a 3-D project since I don't do those often.  I was going to do a card set in a box, but I didn't know how to incorporate all the elements.  Finally I decided on trying something I had never done before - an exploding box (thanks to Anso at Glitter Adventure for the directions and sizes)!


As with many of my challenge projects, I made it with my husband in mind.  I kept the outside simple with the kraft cardstock because I wanted a neutral base so that the patterned paper could be seen.  I also chose it because Howard says it's interesting that I actually have kraft cardstock.  It's one of my favorite things to work with!


The little cotton bag actually fit inside the box, so it was a perfect way to incorporate all the items together.  Before this idea came to my mind, I had no idea what I was going to do with the little bag.  But before I get into the bag, I'll explain the exploding box.


I figured it was the perfect thing to do because I could use many different patterns from the stack.  I admit I avoided the ones with the skulls on them.  Haha, I did not know how to deal with that challenge.  I used 10 different papers, and I purposely chose the ones that had a pinkish and greenish tone to it since those were my wedding colors.  Since my sentiment was "remember," I wanted it to be an exploding box of memories that Howard and I have already made since we got married.  You can see that in the center of the box, I wrote the following: "Just a few small reminders of all the memories we have made so far!  I love you!"


You can see a few of the memories and the stamped images that go along with them (the car is from Sandy Lion, and the rest are from Inkadinkado sets).  What I like about these memories is that they all happened within the past 4-5 months since our wedding so they're very recent.


In the picture above and below, you can see some more of the patterns from the stack.  I have plenty more pages to fill with the memories that we will continue to make!


Okay, so that's the box part of it.  Now what's in the bag?  Well, the outside of the bag is pretty cool too, I think.  Sarah recently posted on her blog what she did with the bags, and apparently, you can stamp on them!  I was excited to try it, and it was super easy.  I used Stazon ink for the hearts, and I did some masking so that one heart was behind the other.  I used Copics to color it in, which bled a little bit, but because of the sketchy design of the hearts, I actually don't mind at all!  Haha, normally I would've freaked out about it.  I also added the sentiment "remember" once again and added some of the bling.


The last 2 pieces of the puzzle were the buttons.  I had no idea what to do with them, so I took a break and went to brush my teeth and dry my hair.  Then suddenly I thought of how I could use it to secure the ends of a long piece of embroidery floss where I would tape the actual memorable items that I had initially planned on just putting in the bag.  As you can see, the pink button is hanging out of the bag so that Howard will know to pull the embroidery floss out to see the string of memories.


The tea bag for green tea is from Costco, and it's what we drink when we get sushi delivered to our apartment as a treat!  It isn't sushi if you don't have super hot green tea!  The card for Sum of All Thrills is from Epcot.  We designed our own mild rollercoaster when we were on our honeymoon and rode it (and I didn't even have to push the emergency stop button!).  The Band-Aid is a reminder of when I got a deep cut in my finger from opening a plastic bleu cheese container.  It scared me so much because it wouldn't stop bleeding, so I was crying and being hysterical while Howard took care of me.  The ketchup packet is to remember the long wait we had for Heinz ketchup to go on sale (yay for Labor Day sales!).  I don't know how to eat burgers and such without it (or when I made cheeseburger pie, YUM).  Lastly, the CVS prescription bottle cap is a wonderful memory of how I was finally able to switch to Howard's insurance in September, which meant I could fill my 2 prescriptions and pay a LOT less for them!

Phew, what a fun challenge!  I'll be waking up tomorrow morning (well, technically it's today already) and posting this on PinkCricut.com.  Please head on over there (blog post here) to take a look at the projects made by my fellow crafters and to VOTE (edited: voting will begin on October 7th so that others can have some time to link up their projects first)!  I'm so excited to see what everyone else has done with the goodies.  Plus, I'm eager to see who will be the Master Crafter!

Saturday, September 1, 2012

Ink It Pink: For the Birds ... (PbD12)

The current Ink It Pink challenge at Pink by Design to use birds on a card ended up coming at the perfect time!  Last Saturday my husband's sister had us over for a barbecue at her fiance's house.  It was the first time that the immediate family was able to get together to sit and have a meal since Howard and I got married.  It was just the 6 of us (Howard's parents, his sister Sharon, her fiance Keith, Howard, and me), yet there was food for an entire army!  There was a TON to eat, and I had intentions of recording it all through Instagram, but once I got my hands on that shrimp, there was no way I was going to stop and wash my hands to use my phone (H took the pics on his phone).  It was all SO GOOD!

The shrimp had a nice kick to it, and so I asked what marinade they used.  They found some recipe online that included hot sauce in it!  Haha, that was the kick!  I typically stay away from spicy foods because of my esophagus issues and reflux.  Plus, I don't really like hot sauce.  But in that marinade?  I totally changed my mind!  I think I ate practically 2 skewers of shrimp by myself.


Their dad also made these little fish in the smoker.  They're not quite anchovies, but I guess they're somewhat similar?  I had a bite and wasn't that big of a fan ... at least not with all that shrimp there!


The picture of the chicken was the last thing Howard took because we were just so intent on eating.  Sharon and Keith also made ribs, sausage, Chinese style beef short ribs, red/yellow peppers and onions (I LOVE grilled peppers; they just taste extra sweet!), corn on the cob, and salad.  It was seriously such a feast!


I admit I was a little worried about the day because there's a slight language barrier between his parents and me.  I can usually understand the basics of what's going on in a conversation, but for some reason, I find it difficult to understand Chinese when I'm with them!  I think I get too nervous.  My mom said that I should have Howard speak Chinese to me more often.  I do know more than I used to since there were days I'd have him do that while we were dating, but it's not enough to get through an entire conversation.  Thankfully, Howard was a great translator when necessary!  I really enjoyed the entire night!  I think it was a nice cozy group to have just the 6 of us there.

Once we left, I immediately thought about the image on the 3 Birds on Parade cartridge.  It just seemed so appropriate to have the little birdie making food on the grill!


It's not really a complex card in terms of the layout, but I think it lets the little bird shine!  And gosh darn it, I had trouble cutting and putting that bird together because my Cricut mat isn't as sticky, so the paper kept moving and tearing, then I cut things in the wrong size, and then I couldn't get things lined up to assemble!  Haha, I think the cartridge is so cute, but it's a tad difficult to work with when you cut it out small.  That's why I'm excited about the Teddy Bear Parade cartridge, which looks much easier to assemble!  But I digress ... as always ...


The sentiment is from Pink by Design's set called "Big Thoughts."  I love the set because sometimes you just don't need a cutesy sentiment or something with a lot of word.  Sometimes you just want a bold word to stand out, and in this case, it was exactly what I wanted.


I'm happy with how the card turned out just because it's so specific to the occasion.  I think it's such a benefit to be able to make your own cards for a certain person or certain event.  That's a good reason to have a ton of cartridges, right?  Right.

Oh, and the fun barbecue night was extended into the next night as we took home a ton of leftovers and had a feast on Sunday as well!  Yay for not having to cook dinner AND for getting to have more of that SHRIMP!


Tuesday, August 28, 2012

Karber Challenge #49: Hobbies & Leisure Activities

A while back, Karber released a freebie image that I was excited to save since it was something I never would purchase on my own.  I'm all about cutesy images, which is why I have Karber's Millie and Leslie digi stamps.  This gave me an opportunity to work with something new.


I actually enjoyed making this card although I admit it was a bit difficult to color!  I'm all about thicker lines, haha, because I'm like a kid and sometimes have issues staying within the lines.


I added 2 strips of patterned paper to the back to keep more of the white on the card.  The image was printed rather large, so I didn't want anything else to draw attention away from it.  The sentiment is from Pink by Design's set called "Love Always."  Maybe I'll work with different digi images again in the future!

Ink It Pink: "... the school bell is ringing!" (PbD11)


The latest Ink It Pink challenge at Pink by Design is to use school supplies on a project.  I don't really have to buy school supplies anymore even though I'm a teacher because the few things I need are provided by the school, which means I don't have any here!  But despite not being a student myself for many years, I still have plenty of looseleaf!  I knew that I wanted to do something with the looseleaf instead of just using it as a background paper, so I used my new Fiskars heart punch.


I layered the hearts on primary color squares because they just remind me of school!  I also needed the hearts and the light blue lines to pop out more to be seen.  Of course, I had to use one of my top 5 favorite PBD stamp sets called "Our Kids," which I guess is very fitting for this challenge!


When toying with ideas on how to place it on the card, I had the idea to use the Martha Stewart stars border punch because that reminds me of school too!  I chose black so that it would be completely different than the blue, yellow, and red, but then I chose to add white embroiderly floss all over it because it reminded me of chalk on a chalkboard (thankfully, we use dry erase at my school because my hands would get all chalky every day!).


Now I'm curious to know what the next Ink It Pink challenge is going to be!

Thursday, August 9, 2012

Wedding: Dreamlite Photography


A Review of Our Wedding Photographers: Dreamlite Photography (website / Facebook)


As I stated in my own personal vows, I was never quite ready to be a bride even though I was definitely ready to be a wife.  Though my high school years were filled with hours spent online looking at bouquets and favors and mentally making lists of the things I liked, when it came down to actually doing it 10 years later, I wasn't interested.  All of the items on my "I-really-want-to-have-these-things-for-my-wedding" became a short "I-only-NEED-3-things" list.  Those things included the following: (1) a simple dress that didn't require an entourage for me to do basic tasks, (2) a church and a reception venue that had natural lighting and no frou-frou qualities, and lastly (3) a duo of great photographers.  I just wanted to be married and not deal with all the intricacies of wedding planning for our day in May 2012.

I didn't know where to start when it came to the photography, so I posted on my Facebook wall and asked for suggestions.  We got links to photographers that had more of a "couture" and runway style and photographers that cost an arm, a leg, and quite possibly a few internal organs.  It wasn't until one of my church friends recommended Dreamlite that the search for this particular vendor was over in my mind.  I sent the link to my guy, Howard, and he agreed that they had the exact look and style we wanted.  We wanted pictures that captured the candid moments of our wedding as well as those posed shots that wouldn't look stiff and rigid.

Contacting Dreamlite was the next step, and it only confirmed that we had found our photographers.  From that email onward, Dreamlite became Jon and Howie for us.  It was no longer just a photography vendor but two guys that we soon grew to know more personally.  Their patience for us was astounding!  I initially contacted them in July of 2010, and we didn't officially sign any contracts until August of 2011!  During that year, we exchanged many emails about their photo packages and constantly changing dates.  We also asked them for recommendations about other vendors.  Jon and Howie were willing to answer any questions about wedding planning even if it had nothing to do with photography.  We really appreciated their honesty and genuine opinions about all the details of the industry.

A year after that initial email, we met with Jon and Howie at my local Panera.  I was grateful that they were willing to come in from New Jersey to Staten Island.  Howard and I showed up earlier than the meet time, and we sat in the car for a little bit because I was nervous!  I admit that I don't like meeting new people and dealing with new situations, but eventually, we went in and found that they were already there set up!  My first thought was a positive one because I too am a stickler for not just punctuality but being earlier than the designated time!  The meeting flowed as I asked them what I thought were silly questions.  Jon and Howie answered everything with such professionalism and humility that Howard and I felt relieved that they had wanted to meet with us.  We never felt pressured, and they were the ones that actually encouraged us to think more about whether they would fit into our wedding day and to look over the contract to ask them anything else.  At that point, we really didn't have many more questions since they had shown us sample albums and gone through the minutiae of the contract.

Before the wedding, we discussed via email the schedule for the day and any specific shots that we wanted.  They told us that if we came up with anything else, we should let them know.  I sent them a few strange requests (ex. I wanted pictures with the chairs at the venue because they were my favorite!) and a picture that we wanted to recreate.  They kept a list of everything as well as the photo on their phones so that I didn't have to worry about anything on the day of.  It was a relief having responsible people on our "team" for our wedding.

I thought that it'd be awkward having photographers take pictures of us all day long.  We didn't have a chance to go through our engagement session before the wedding because we were too busy, but it ended up not being an issue at all.  Jon was scheduled to be at my house in SI, and Howie went to Howard's house in Brooklyn.  My bridesmaids and I literally just went about our day getting ready as Jon took pictures of our hair and makeup along with some shots of my cousins making their breakfast and my eating it.  I really enjoyed seeing those pictures of everything we did.  Jon then went around and took pictures of details in my parents' house, including my mom's calendar with our wedding date on it and scattered wedding things we had around.  My mom was surprised that he was taking my shoes out on the balcony since the wood was rather worn and weathered, but Jon made it work!


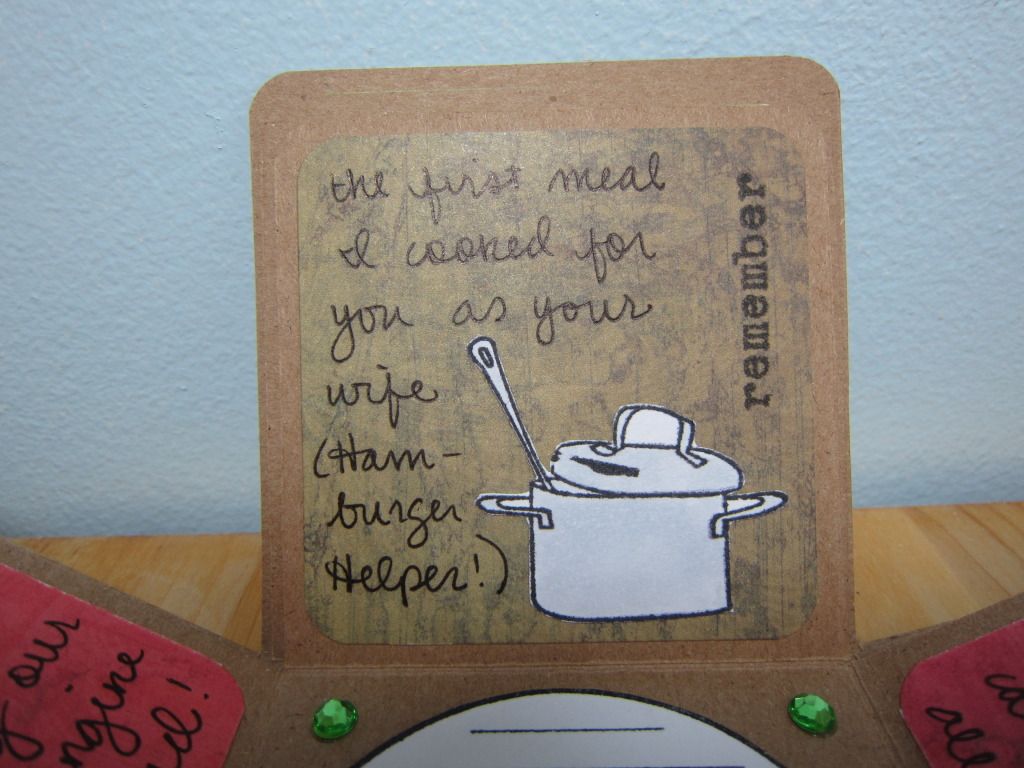
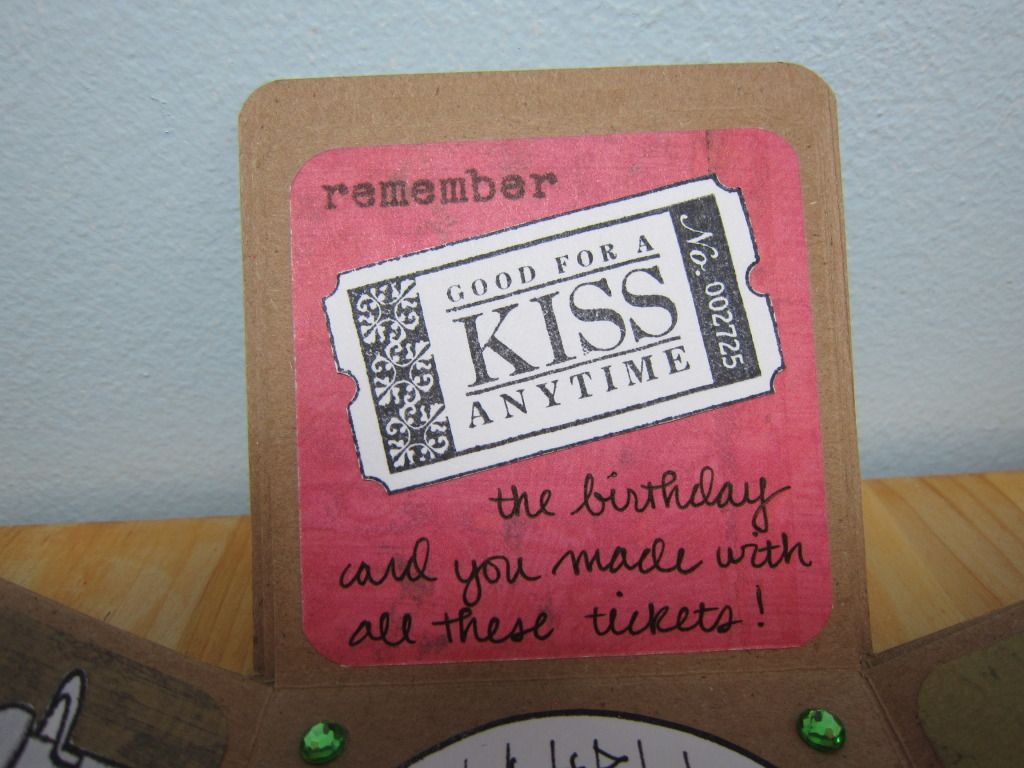
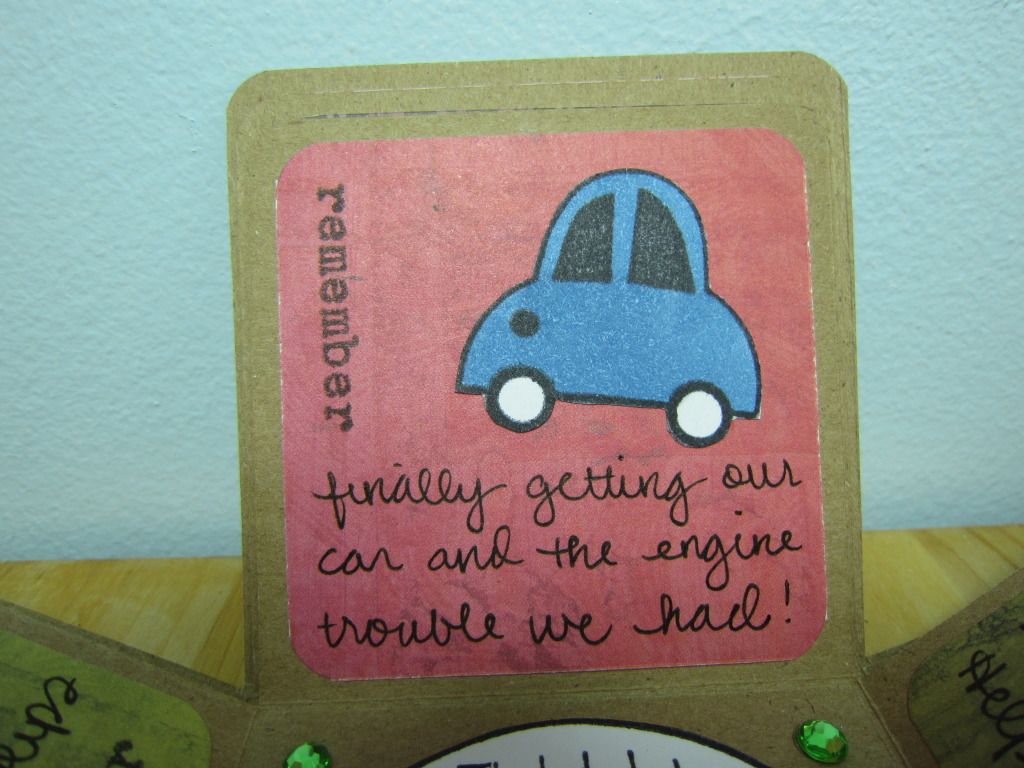
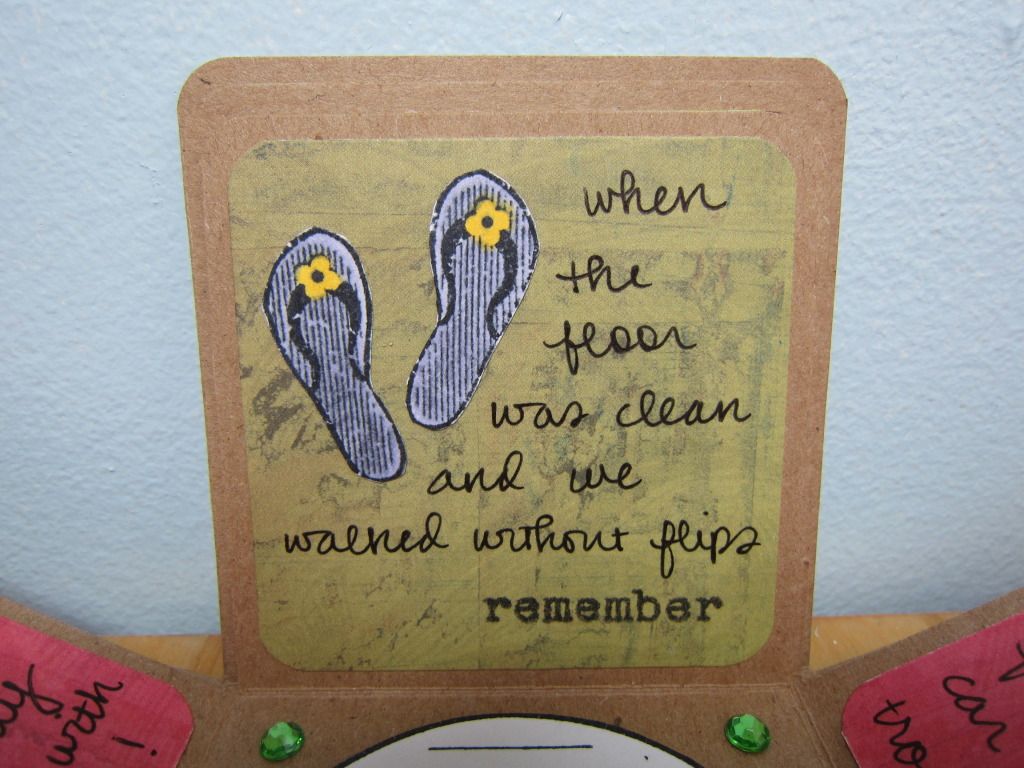
During that hour or two of preparation, I had a few ideas pop into my head as well.  It was very easy to tell Jon what else I wanted, that I wanted pictures of my Build-A-Bear from Howard (yes, I am 27 with my own teddy bear) and I wanted him to capture my putting my vows together on cardstock since I'm interested in papercrafting.  I never felt any awkwardness even though I thought it'd be odd having people I didn't know very well in the house, but it just never crossed my mind.  Jon knew exactly how to handle all situations, and he was extremely polite and respectful to my parents who were just meeting him for the first time.  My parents warmed up to him very quickly as did my bridesmaids.  I was loving the way my morning was going!


Jon got some last few shots before heading to the church.  We had discussed earlier whether or not they'd be in the limo with us, but they preferred driving to and from the venues on their own.  It worked out better that way because they were there to get arrival shots.  It was also nice to have some moments in the limo with my parents and my 2 bridesmaids.  Jon and Howie also communicated with each other to make sure that Howard was in the church where he couldn't see me before the ceremony.  They literally made things easier on us and took charge of a lot of the things I would normally feel I had to handle myself.

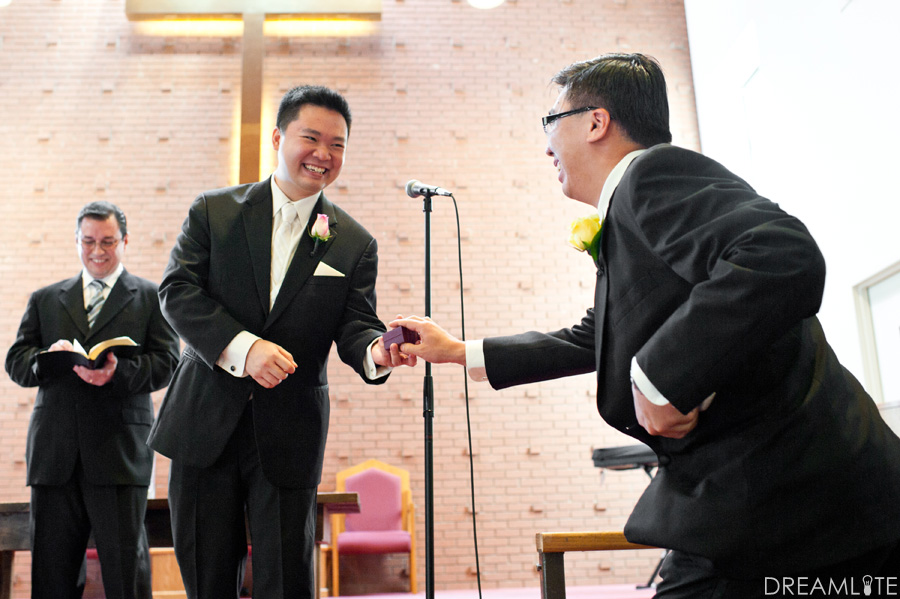
The benefit of having two photographers working together is that not only did we have separate "getting ready" photos, we also got two different views during the ceremony.  One stayed at the front, and one stayed at the back when I was walking down the aisle so we didn't feel like anything was missing when we got our pictures.  They caught the sentimental moments, the glances and faces Howard and I made to each other, and even the funny ones, like when our best man handed us the wrong rings!  They really captured the moments, which was important especially since we didn't have an official videographer.


When the ceremony was over, we had to take group photos at the front of the sanctuary.  This was a little stressful for me because both of our families are rather large.  Plus, everyone and their grandmother had a camera, which meant we were standing there with the same people for longer than needed!  I was getting a little impatient because I wanted to get to our venue at Snug Harbor to take pictures with our bridal party.  If Jon and Howie felt any of the impatience that we were feeling, they didn't show it at all.  What was great was that they took a picture of the huge group taking pictures of us!  It definitely was a memory that we might not have wanted to have at the moment, but it's funny to see it now when the wedding is in the past!


Eventually we left the church and took the limo to the location of our reception.  We dropped off our belongings in the bridal suite and then headed out on the grounds to take photos.  Jon and Howie worked very well as a team, coming up with ideas for spots to take photos, testing the lighting, and doing all the technical stuff that I didn't understand at all.  I just really enjoyed the fact that I could trust them with the photos and not worry about anything.  After some great shots with our bridal party, Jon and Howie sent them back to eat during the cocktail hour so that Howard and I could have a more private session for just the two of us.  This was suggested to us by Dreamlite, and we couldn't have been happier about it!  We didn't really think much about it earlier, but if they hadn't encouraged us to set that time aside, we would've lost out on the majority of the pictures Howard and I really love!  They helped us out, giving us pointers in how to pose since before this point, Howard and I were all about those one-handed shots! We also told them during our Panera meeting that it was a little strange for us to be kissing in front of others, so they were very mindful of that fact.  It worked out extremely well that we didn't have an audience during our session!  It was just a lot more personal and private, which we really enjoyed!


When we returned for the reception, things moved very quickly.  I didn't see Jon and Howie as often since I was so consumed with everyone that was around, but in reality, they were everywhere because we got pictures of everything!  I wanted pictures of the food; they got it.  I wanted pictures of all my DIY touches; they got them.  The two-person team really works because one of them was always around to capture moments while the other could photograph details.  At one point, they asked for our rings and got some creative shots that Howard and I both love!


Howard and I had to go through the long process of taking pictures with every table.  It was a lot of "Oh, he just went to the bathroom" or "I don't know; she was just here," and I was wanting it all to be over with faster.  Howie followed us around without any problems, and I apologized numerous times for how long it was taking, but it didn't bother him at all.  I guess Jon and Howie have seen and experienced it all!  While we were dealing with those necessary but "boring" photos, Howie got a great shot of the table photo in the screen of someone's iPhone!  I liked how even in the more typical rounds of photographs, the two of them could still see other creative opportunities.


When the dancing finally picked up during the last hour, Jon and Howie caught so many of the hilarious moments.  They weren't afraid to literally get down on the floor to get the right shots.  Those were some of my favorites as well because everyone was just having fun, and they caught their laughter and enjoyment on camera.


At the end of reception, we said goodbye to our guests and were about to say goodbye to Jon and Howie.  Thankfully, they had kept in mind my request for photos with THE chair, so they set up a little area for a quick photo shoot.  I'm so glad that they remembered my list of must have photos so that it didn't have to cross my mind.  I was so relieved that the day was over, but I was also extremely glad that Dreamlite had made the day go by so smoothly!


What made the whole experience working with Dreamlite even better was that they posted teaser photos on their website the very next day!  Even though we got to see some pictures from our friends on Facebook, it was amazing to get a glimpse of what our professional photos would look like!  Then instead of having to wait months and months like I know others have had to do, we got our two wedding CDs within a month!  Would we recommend choosing Dreamlite?  You betcha!  Will we personally find a way to use them again?  Definitely!  Even though it's still way too early for this (we've been married for less than 3 months; I don't know why people are asking ...), Howard and I have already discussed how fun it'll be to get some family shots once we begin having kids.

Tuesday, August 7, 2012

Ink It Pink: Get Your Punny On (PbD09)!

Since the Saturday celebration of Pink by Design's two-year anniversary, I've been crafting a lot more often. I decided to enter the Ink It Pink challenge for this week, which was to use one of the puns from PBD!  I decided to use two sets of PBD stamps called "Make It a Venti" and "Perk Up" on a simpler card.  As you can see from a few of my more recent cards, I'm trying to keep more white on the front.


I used paper piecing to get different patterns for the mugs.  I am loving paper piecing lately!  It makes it easier to put a card together since I still haven't mastered coloring with Copics (still don't have the right paper that won't bleed).  I went with a pink theme mainly because I have a lot of pink scraps!  I can imagine making a lot of the tall and short mugs with my scraps.  

I hope I can participate in the next challenge as well!  I think the challenge bug bit me once again!

Friday, August 3, 2012

A Bird Card for Two Real Birds!

I've been having fun keeping my cards clean and simple with a lot of white space.  Another thing I wanted to try doing was to place the elements on the card in a different spot.  I rarely only use the lower half, so that's what I wanted to do with this bird image from my new Recollections stamp set.  


The sentiment is from Pink by Design's "Spring Has Sprung" set.  I love how this bird kind of looks like a cute gumdrop, haha.  I wasn't sure what colors to use, so I actually took a look at Toucan Sam from Fruit Loops just to get an idea.  I didn't get into the purples and pinks, but it helped me decide on what colors to use for its beak.


When this card was put in my Facebook store, two of my regular customers purchased it, and that meant I had enough for the two chickens through World Vision!  The chickens will be given to a family that can then use it for nutrition and income due to the extra eggs and chickens!  I know it's not much, but it's a small way that I can use something I enjoy for the glory of God!  I want to spend my money on crafting things, but I know that I don't need anything more than I already have.  My only expense should be paper and adhesive when I need it.  Other than that, I just have to stop and think how buying one Cricut cartridge could provide food and the start of a small business venture for one needy family.


I hope to be able to donate money to get different animals as well!  Hmm, what's next on the list ...

Thursday, August 2, 2012

Cupcake Series #1

This past Monday, Howard and I went to run our errands, which included stops at the supermarkets.  It doesn't always include a stop at Michaels anymore, but I had a 50% competitor's coupon that I wanted to use on 12x12 Recollections cardstock (it's difficult when all the things you want to cut have green, and you don't have anymore green!).  Then I also got an email for $5 off $20 from the Michaels Loyalty program, so I figured it was the perfect time to go (I have never used any of my rewards before).  The Fiskars punches were also 50% off, so I had a general idea of what I was going to get.  When I brought my things up to the front, the $5 didn't come off because apparently the stuff that you used with the coupon doesn't count towards the $20. That didn't bother me that much since I had plans to get the paper anyway.  

So I went around and picked up some stamps that were being clearanced out.  That's the perfect stuff to get because you can't use any other coupons anyway!  I love the two sets that I got.  I had been eyeing the Recollections animal set ($2.99) for like, a year or whenever it first came out because of the bird, the zebra, and the chameleon!  So cute!  The cupcake stamp set ($1.50) was also something I picked up many times in the past as well but never purchased.  Cupcakes are perfect for anything ranging from "thinking of you" notes and birthday cards.    In my basket, I also had a Fiskars heart punch ($6.50 on sale) so I can have an easy punch to use for scraps and for a few card ideas I might like to try out.  To make up the rest of the money needed, I threw in a Versamark marker and a box of ATG tape (hopefully, my last box for a while since I'm participating in a tape share).


Anyway, I really liked the purchases I made especially with the $5 of "free stuff" (I see the tape as the free part since I normally always use 50% coupons on it).  Once I got back, I had some ideas swimming in my head.  I knew I wanted to paper piece the cupcake wrappers.  I chose some patterned paper scraps.


It was nice to do paper piecing to get some variety in cupcake wrappers instead of having to color it myself. Of course, the fussy cutting can take some time, but I like how it looks.


What's interesting is that Howard and I recently picked up cupcake wrappers so that we could make muffins.  We bought the plain ol' white ones because they were the cheapest, and I had a 20% coupon off of entire purchase at Michaels.  These would be so much prettier!  I struggled with the placement of the pieces of the card, but in the end, I decided to do 2 strips of the same patterned paper to bring it all together.  In my eyes, it worked out because I like CAS cards with all the white.  


I used a sentiment from Pink by Design's "Birthday, Birthday," which is a set of so many fonts of "Happy Birthday"!  I love it!  One to fit every type of card or space.  Since I got hooked on the white embossing, I had to do it again!  I think it works, don't you?


Took a while to get this done because I couldn't decide on what looked good, but I was happy with the final result.  Stay tuned for two other sets of cards using the other cupcake wrappers!