Showing posts with label Cartridge: Sweet Treats. Show all posts

Friday, January 24, 2014

A Deliciously Sweet Birthday Card

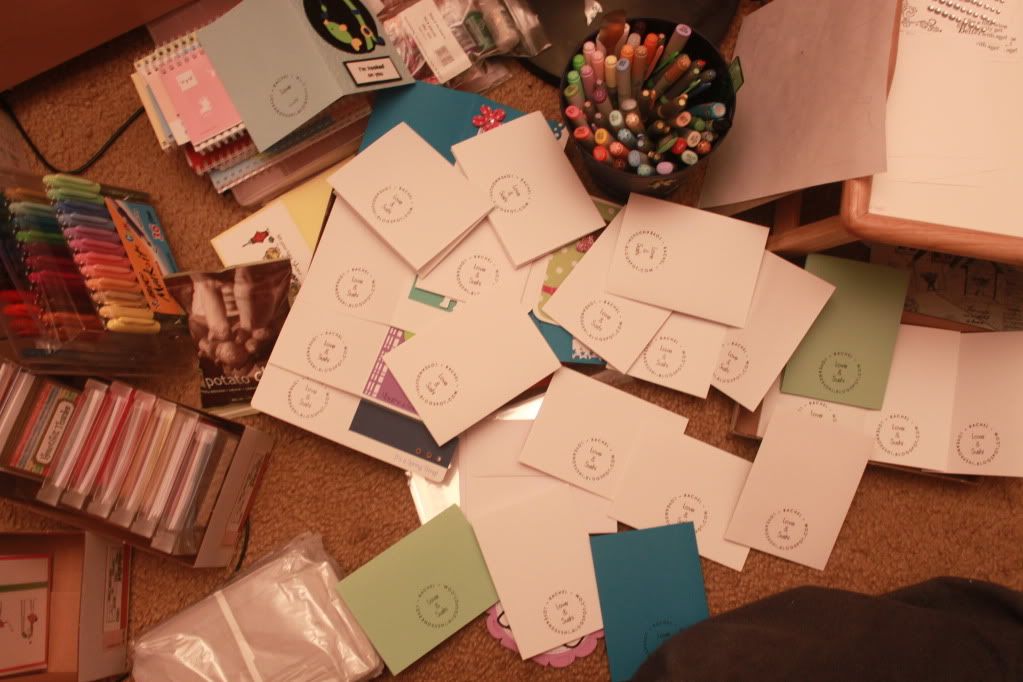
The College and Early Career group at my church often passes around cards at the beginning of Sunday School so that everyone can sign them for birthdays. It's kind of funny how some people attempt to do it secretly while others just blatantly skip the recipient when passing it around because we all know what everyone's doing! My sister-in-law Sharon is in charge of keeping track of the birthdays and bringing the cards for everyone to sign.

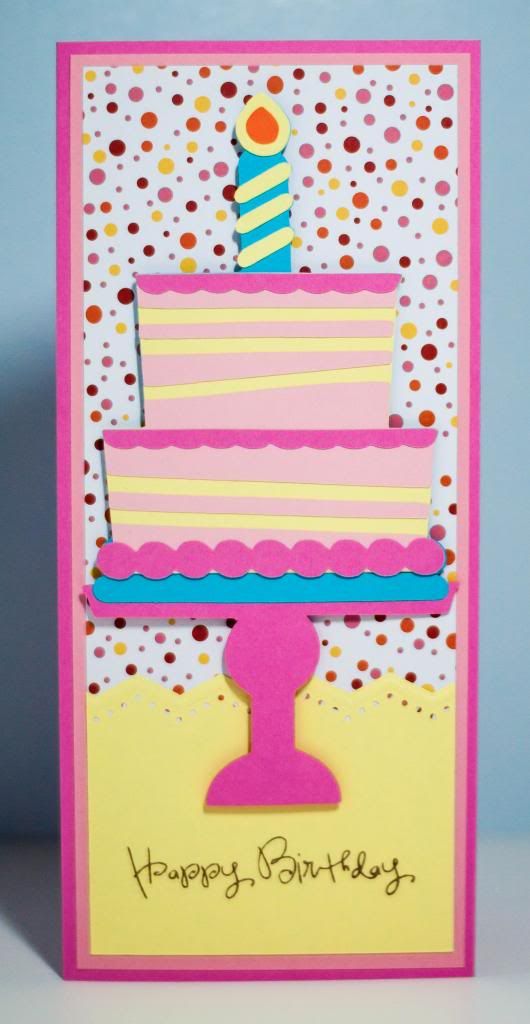
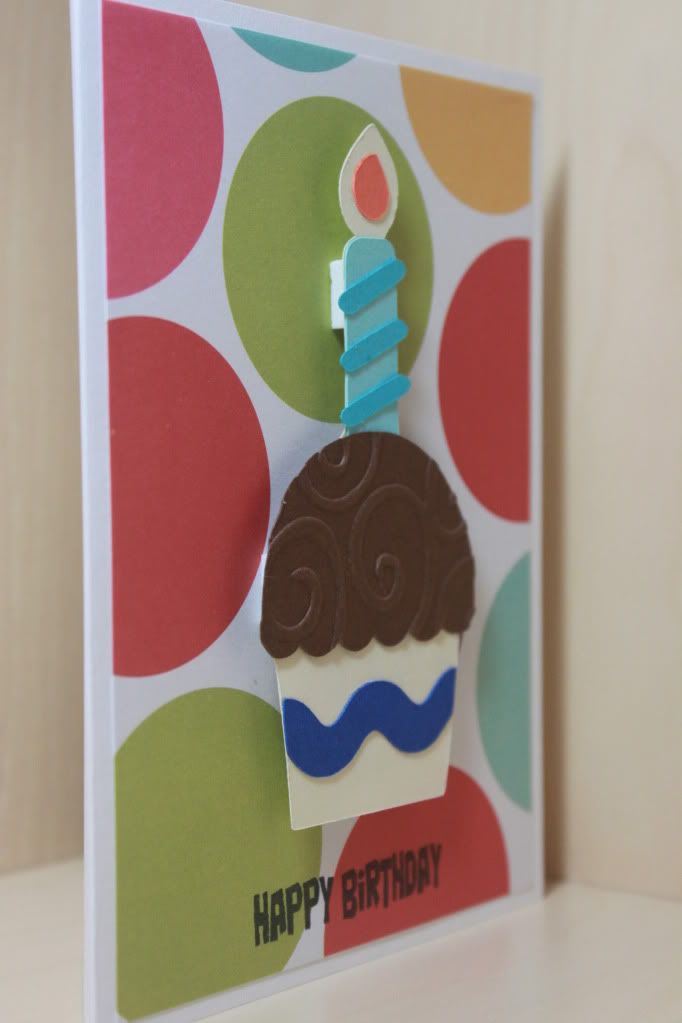
Well, Sharon's birthday was at the beginning of this month so one of our leaders asked me to make a card for her. Howard and I looked at the options on the Sweet Treats Cricut cartridge and both liked this ice cream cone. I decided to make a large shape card just to make a bit more interesting. I cut it out at 8 inches. 


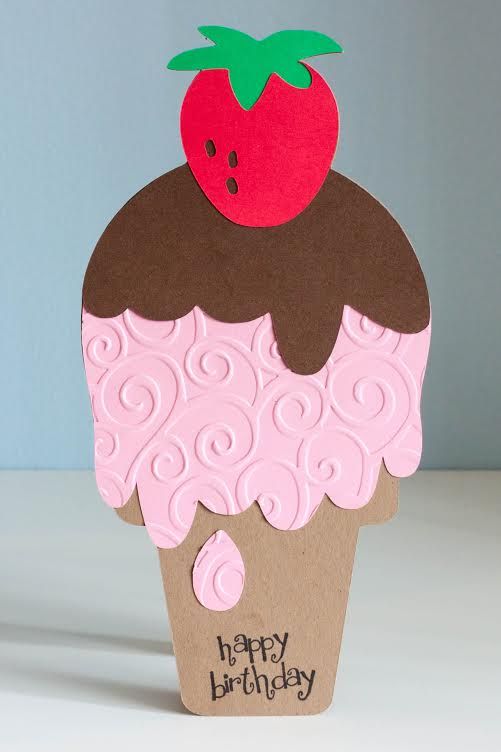
I did cut the chocolate syrup layer again in green, but I just didn't put down paper to cover the entire portion on the mat since I only needed the top part of the strawberry. I don't know why they didn't make an extra piece for that because if cut out exactly as it is in the handbook, the strawberry top would be brown too. Oh well. With Cricut Craft Room or a Gypsy, it's a lot easier to avoid wasting paper.

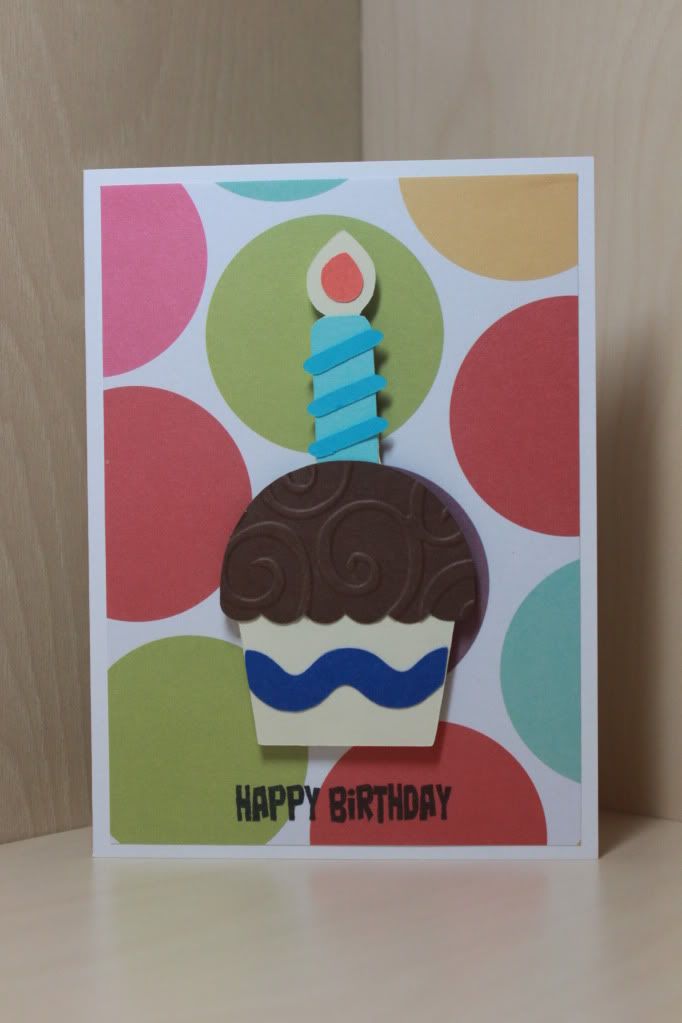
To add a bit more dimension, I used the D'vine Swirls Cuttlebug folder to emboss the pink ice cream. I would have done something more for the cone, but I couldn't get the sandwich correct with what I had. Plus, I didn't want it to look too busy. It worked out in the end since I needed a spot to stamp the happy birthday sentiment from Pink by Design's "Birthday, Birthday."

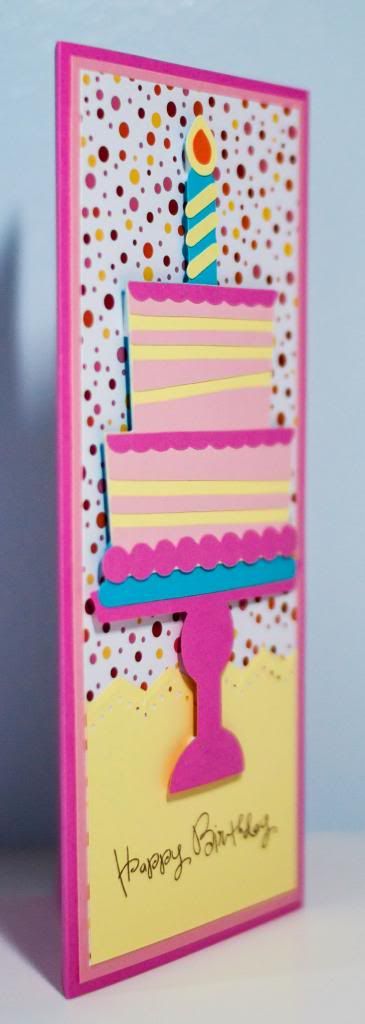
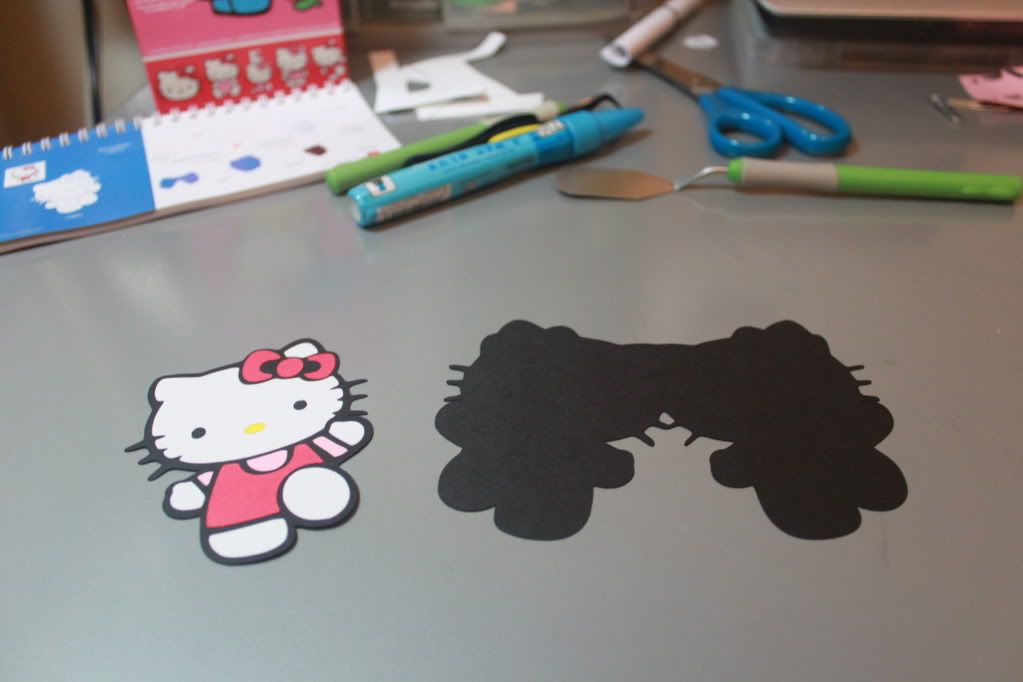
As you can kind of see in the picture below, I don't weld the front and back of the card in Cricut Craft Room. Instead, I cut out two of the same base pieces and score the back piece so that it can fold. Then I just use my ATG to attach them together. I prefer doing it this way because I think it looks better not having a flat top. Plus, there'd be no way for me to fit 16 inches on my cutting mat.


I finally had the opportunity to use my We R Memory Keepers envelope punch board! I had taken a picture of it along with a sneak peek of this card in a recent blog post. I did make it a little bit bigger than it needed to be, so next time I'll know that I can stay more true to the sizes on the board. I used a font from Lyrical Letters and welded the letters together for the front of the envelope. Now that I have the punch board, I'm looking forward to making more shape cards just like this one.

Thursday, September 19, 2013

Happy [Business] Birthday!

One of the cards that I've been dying to recreate is based on this card I saw on Faith Abigail Designs and pinned on Pinterest.  I thought that the cake on the cake stand from the Sweet Treats cartridge looked so perfect on a 4''x9'' card, which basically mean it fits inside a business envelope.  I am so intrigued by the idea of cards in business envelopes because that means if you send it in the mail, the recipient doesn't expect it to be a birthday card!


I only made the slightest variations to the card because I really LOVED the card she made.  I think there's a lot going on with this card in terms of the bright colors, but its cheery look is just perfect for a birthday celebration.


The measurements can be found on her blog post, so I'm not going to get into that here, but the sentiment I used is from Pink by Design's set called "Birthday, Birthday."  This card can be found in my Facebook store if you're interested!

Tuesday, November 8, 2011

Cuz Everyone Needs Birthday Cards

This past Sunday was my church's bake sale to raise money for the North American Mission Board and the International Mission Board of the Southern Baptist convention.  I've been making cards for that cause, so that's why I haven't posted anything here on my blog for a while.  Thankfully, Howard was able to help me with some of the coloring, and he helped me package everything too.  Boy, I really do love how the boxes and bags from Clearbags.com really make my stuff look even more professional!  Of course, I accidentally ordered A1 envelopes instead of the A2 that I needed, but that's a whole different story.  I also love my PSA Essential stamp that I won from a Casual Fridays challenge back when I still entered challenges!


I stamped the back of all the single cards I've made in the past for challenges.  Some of those sold at the bake sale too.  Since the ink is so wet, I have to make sure it dries before I pack it, so that's why they're spread out everywhere like that.  And yes, my room is an absolute mess from crafting, but I love it!

Anyway, I think my sales were pretty good!  I was able to raise $227 for missions from the sale of my cards, which was almost a quarter of what the English congregation of my church made!  The other things that were available were lunch items and desserts.  I was happy to be able to do something I love for a good cause.  And I was thankful that so many were willing to buy!

Well, even though the bake sale is over and I should be getting back to school work, I can't.  I'm just way too distracted and stressed, so I still crafted today instead of grading papers.  It was definitely much needed relaxation time because I took my time today whereas crafting for the bake sale was a little bit closer to the frenzied side!  Anyway, I'll show you one of the cards I made today.


I had 12 of these cupcakes from Sweet Treats cut a while ago, and I made 6 cards with them for the bake sale the night before because I realized I didn't have many birthday options!  I had one of my friends buy 1 of them, and then another friend bought the box with the remaining 5 in it!  I know a few others wanted this card too, so I made the other 6 today since I still had another sheet of that pattern paper from a KI Memories paper pad.  My cousin already claimed 2 of them, so I had 4 to sell.  After posting them in my Facebook store for just a short while, I'm already down to 1 left!  I really need to make more birthday cards!


I decided to go with blue accents instead of the normal girly colors I usually use.  It might still be a tad girly considering there are big polka dots, but at least it's not all pink and purple.  I used the Cuttlebug D'Vine Swirls embossing folder for the frosting on the cupcake (chocolate frosting, of course!).  I popped up the image using my Oriental Trading Co adhesive squares.  I love how I can use a ton of those on one image and it's okay since they're so inexpensive.  The sentiment is from Pink by Design; I love this set called "Birthday, Birthday" because it just says "Happy Birthday" in many different styles and fonts.  Perfect for any type of card!

That's it for now, but don't worry.  I won't leave this blog for such a long period of time anymore!  Well, at least that's what I'm hoping not to do!

Friday, June 24, 2011

Challenge: Shaped Birthday Card with Sentiment

On top of sleeping as much as I can, this summer I'm trying to enter challenges on other blogs.  Not only are prizes super fun (woohoo!), they also really get me to think outside the box.  If you've been following my blog, you know that most of my cards are pretty much the same ol' same ol'.  Well, the challenge this week at Birthday Sundaes was to "create a shaped birthday card {no squares/rectangles allowed} and include birthday wording/sentiment on the card front."  For me, that would definitely be a challenge!

When I started, I wasn't quite sure where I was going with it.  I used a new cartridge for it though - Hello Kitty Greetings!  It was the one I won through a blog candy giveaway from Theresa over at Scrappers Anonymous.  The first thing I cut out was an image of Hello Kitty herself (cut at 3 1/2 inches)!


Then I thought I'd use the card feature on this cartridge for the actual shaped card, but when I cut it out, it wouldn't really match up.  Plus, it was super small.


I decided to change my idea and instead took out another card that I've never used before - Wild Card!  I've seen many people use the doily card, and I wanted to use it too!  It cut very easily at 5 inches.  Of course, it was a birthday card, so I cut out a present from Sweet Treats at 1 1/2 inches.  Then I had to choose a sentiment.  I picked one from Pink by Design's "Take the Cake" set.  As you can see in the following picture, I decided to curve the sentiment on the acrylic block a bit since I wanted it to line up with the circle card.


Since it was a challenge card, I actually tried it out on scrap paper to make sure I Had the right pressure.  Haha, and you'll also see that this was not the final design because I changed the location of the present to her other hand.  Oh, and the picture spoiled the fact that I added some purple faux stitching with one of my Bic Mark-It markers!  Here's the final result after it was all put together:


And just because Howard has been telling me it's better to shoot with a white background, I pulled out my folded poster board to shoot that way.  I was having a ton of issues with it though, and they all kept coming out super crooked.  Haha, thankfully when I uploaded the 73 million I took, I just cropped it in Paint.  No fancy-shmancy Photoshop here!


You can see that I used those lovely foam adhesive squares to pop up the present.  Plus, I added a bit of bling to the bow!  I love it when I get to add bling to the actual image!


Though it may not be that creative as compared to the really talented crafters out there, I like how it turned out.  I was able to use carts I've never used before, and I was able to step away from those darn rectangle cards!  I might just have to go back to the safety of a rectangle card after this, but I did enjoy the challenge!

(And just because I think it's so cool when I add my link to any site, click here and you can see my card at #48!)

Monday, May 9, 2011

My Pink Stamper Challenge #5

This past Saturday, I went to AC Moore because I wanted to buy the Martha Stewart scoring board.  I also bought a few other things since they were having Double Rewards Points for purchases of $25 or more.  Haha, they really get me there!  Anyway, the first thing I made was one of those gateway cards or whatever they're called.  This following item is the SECOND thing I made with my new scoring board!

Challenge #5- Any 3-D item OR if that is too much of a challenge then add a 3-D item on your scrapbook page or card!
(MyPinkStamper post here)


I made a box!  I followed the directions and cut out two 8x8 pieces of paper and scored it in the right places, snipped a few edges, and glued it all together.


The flower was cut from Sweet Treats if I'm remembering correctly.  This is actually the same flower I cut for my mom's Mother's Day card.  I like how it came out with the blue (her favorite color is blue), so that's why I decided to stick with it for this one.  I used the Swiss Dots Cuttlebug folder to emboss the biggest petals.


I thought the sides looked a little boring, so I took the same colored paper and punched the flower pattern using one of my new Martha Stewart punches.  I like that it matches the flower on top fairly well!  I also think it brings the entire box together a bit more.


I like knowing that when possible, I can just make a little box for a small gift!  BTW, I love that they take in account that the lid has to be a bit bigger than the bottom so it slips on and off easily!