
(1) Warm Wishes!
I made this card for HF because he recently bought a neck warmer from LL Bean, and he also just bought me Isotoner SmarTouch gloves (mainly to grip the steering wheel, not because of the phone!). Even though it wasn't a hat and mittens, I just like the "warm wishes" sentiment!
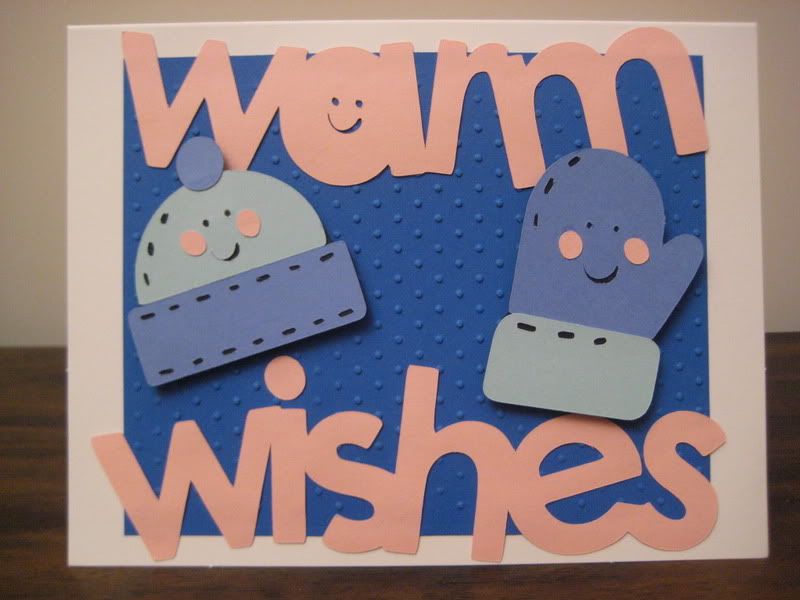
Cartridge: Simply Charmed for the hat, mitten, and the sentiment
Embossing: Cuttlebug Swiss Dots folder
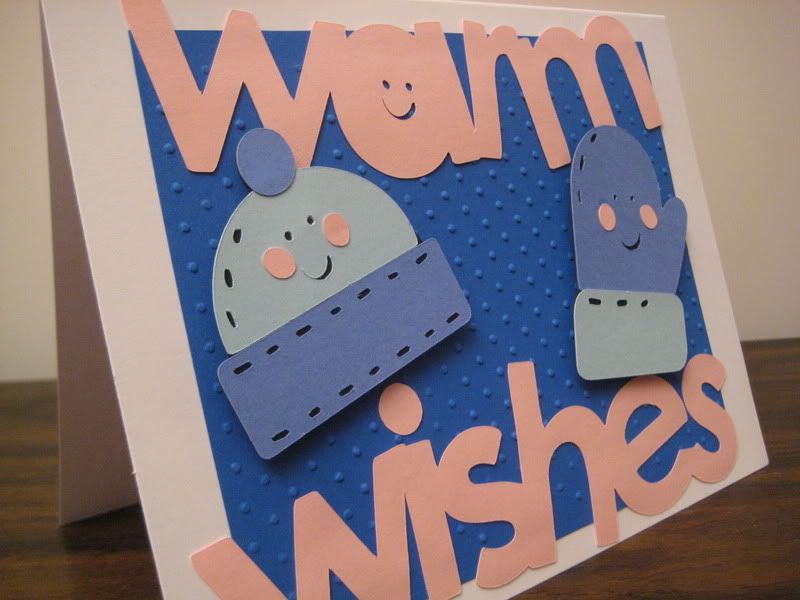
Making this card was "difficult" because I cut out the mitten first, and then I cut out the words at a much larger size! I figured that since the mitten was smaller, I'd take up more room with the words. I didn't realize they'd be THAT bad. I didn't want to re-cut anything and waste paper, so I played around with what I had. That's why I decided to add the hat as well to create some sort of balance.
I learned that I could use the Cricut pick tool to make the holes bigger, so that's why the eyes on the hat are larger (and cuter, in my opinion) than the eyes on the mitten. This was also the first time I used the Zig glue pen (chisel tip). I absolutely loved it! It was so easy to use, and I can't imagine having to use any other glue that didn't come in that pen form.
Yesterday I did add Stickles to the cheeks, and I think it adds a little extra something to it. I like it for my first card. However, I don't like it as much as I look at it now but that could be because I know all the trouble that went into it!
(2) Bowl of Noodles!
I also made this card for HF because he loves noodles and dumplings! When I initially saw it in the cartridge handbook, I immediately thought of him and knew it was going to be a card just for my fiancé. His birthday just passed, but he obviously knew that I didn't have my Cricut for enough time to make his card by then.
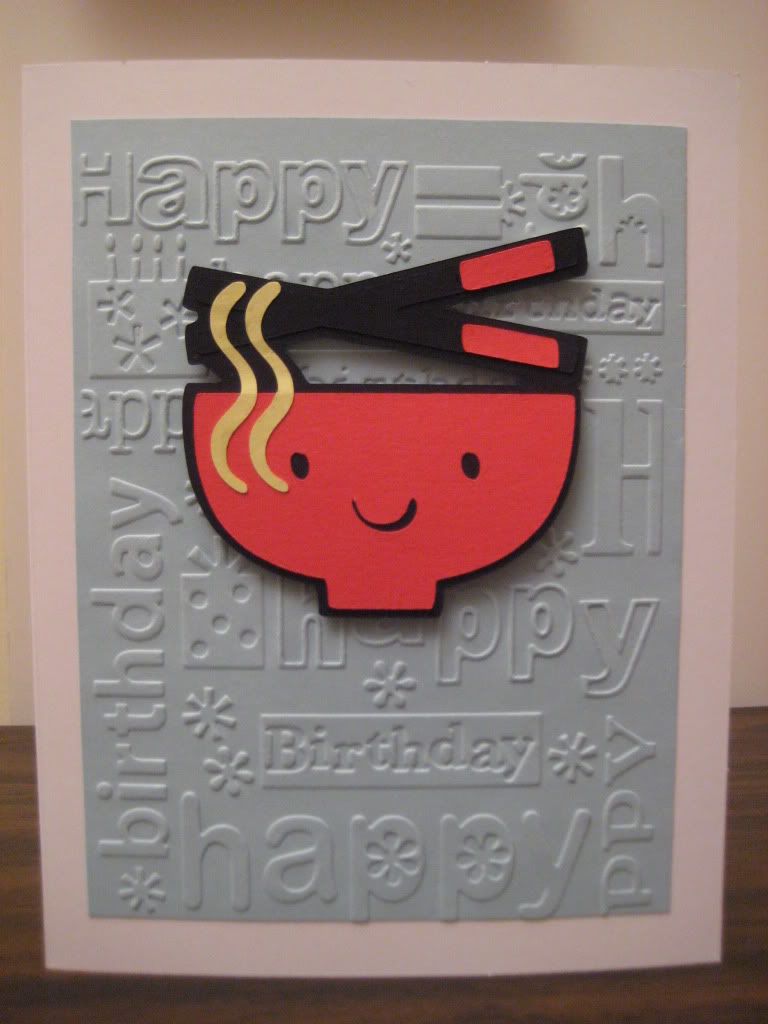
Cartridge: Create a Critter
Embossing: Cuttlebug Happy Birthday folder

As compared to my first card, I'm REALLY happy about this one. I think the simplicity is a lot more pleasing to the eye. This format is very similar to how I made cards in the past when I just used rubber stamps. I would stamp and image, emboss it with the powder, and then do it again on poster board so I could cut out a part to pop it up with leftover pieces of fun foam!
I had a little bit of an issue with the shadow feature on this though. The shadow creates the black outline around the whole image. The shadow makes it so that I can't make the noodles hang very long. That meant I had to make a choice between having them hang in front of the bowl or cutting them to be on the inside (I couldn't actually put them under it because I had already glued the rest of the image). Well, since the noodles were a bit part of the reason why the image is so great, I left them on the outside.
(3) Rawr!
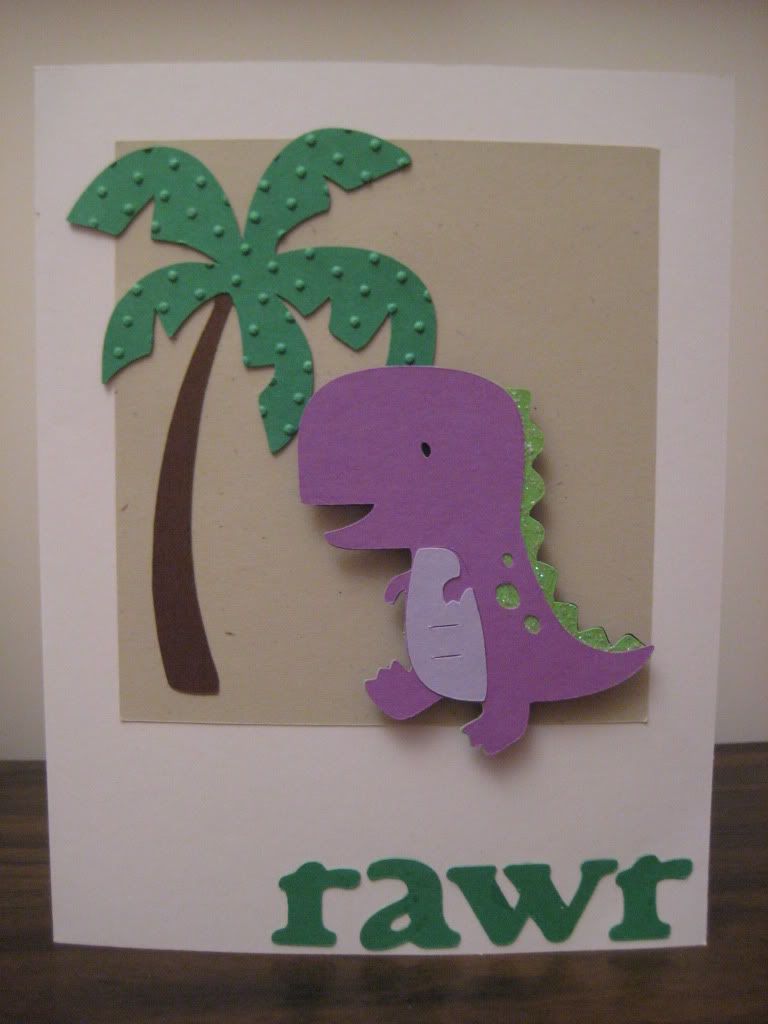
Cartridge: Create a Critter for the dinosaur and tree, Cricut Classic Font for the "rawr"
Embossing: Cuttlebug Swiss Dots (on the top of the tree)
Other: Stickles on the light green

I actually made this dinosaur the night before I put together the card because my mom and brother wanted to see the Cricut in action. I just chose something that I knew would be easy to layer. Since I had it all cut out, I wanted to use it in a card the next day. I cut out that tree, but it was fairly boring. That's why I ran it through the CB (I really need my folders and texture plates!). I cut out the "rawr" and tried to put that somewhere too. It still wasn't coming together. I knew I needed another layer.
I went through my big box of random papers from Michaels. I posted about it a few weeks ago or so when it was the "Deal of the Day." I was able to find that beige paper, which I really liked because it was simple, yet it just tied the card together. I didn't want to emboss it because I wanted the dinosaur to be the star with no distractions. Of course, after I put it together, there was still something missing. It just didn't feel completely put together ... so that's why I added Stickles! I opened up my 3-pack of 1oz bottles of Stickles and used it on the light green parts of the dinosaur.
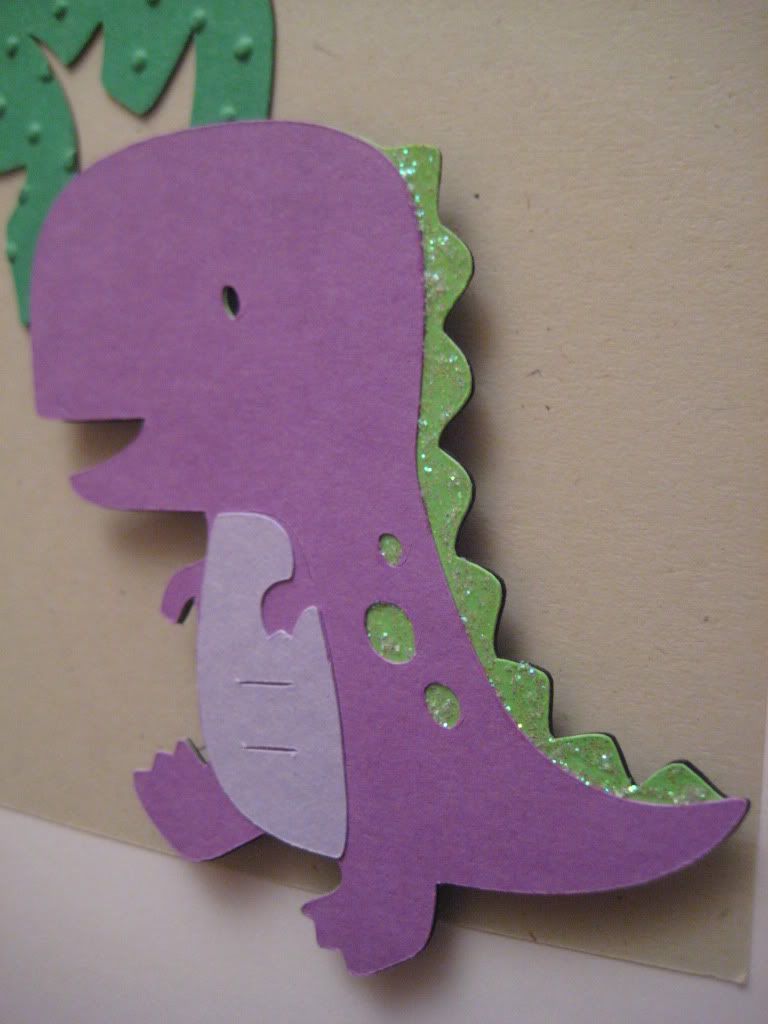
I was very happy to see how well the Stickles worked. I have a big pack of Martha Stewart Glitter, but I wouldn't have been able to use it here since the card was already put together. That's where Stickles came to the rescue! Too bad I only bought 2 sets of the 3-packs when they were only $2.39!
Well, those were my first 3 cards! I'm really excited that I have something to do that provides relief and relaxation from a hard day at work. I can still think about work to some degree (yesterday I was thinking about how to phrase this recommendation I had to write for an 8th grade student), but I can still focus on the task at hand. Too bad we probably won't have a snow day tomorrow otherwise I'd be Cricut-ing away all day long!
Cute cards Rachel! My favorite is the noodles one :). Aren't you soooo glad you bought it?!!?
ReplyDelete@lageorgiapaperie.com: I really like the noodles one the best too because I don't see it used for cards. I've seen the mitten/glove and the dino before I got the cartridge. Plus, the noodles are very specific and just perfect for my fiancé! I think Create a Critter is definitely one of the cartridges that I'll be cutting out EVERY image at one point or another!
ReplyDeleteHey Rachel - it's Megan from the DisBoards! Excited to catch up on your blog!
ReplyDeleteSorry the first link didn't work - let's try it again! http://runningtowardtheprize.word press.com Its primarily about running - but includes other things about me as well :)
@runningtowardtheprize: YAY, I'm so glad you got here, Megan! I saw that you just PM'ed me, but my box was full. Glad to see you here! I got to your blog! I think the issue was that there shouldn't be a space between word/press. I tried it before, but it wasn't working. Thankfully, it works now!
ReplyDelete