Wednesday, July 27, 2011

Summer Lovin' Had Me a Blast

One of my favorite movies growing up was actually Grease!  I don't know why I loved it so much.  The plot line is actually really terrible when you think about it because at the end of the movie, Sandy changes who she is just to get Danny's attention!  Despite that, I still loved the songs and the wacky one-liners (ex. "A hickey from Kenickie's like a Hallmark card, when you care enough to send the very best.").  And of course, who can forget the final scene of the movie when Danny and Sandy sit in the car and drive away before it suddenly starts floating up into the air!  Well, as you can see, that was the inspiration for this funky card!


The car is from Nifty Fifties, which was one of the cartridges I knew I "had" to have when I first saw it.  I'm sure I've said it before, but I belong in the 50s.  I would've loved living during that time period!  I cut it out at 2.75 inches if I remember correctly.  I know I wasn't that original because I used the colors that are shown in the handbook.  It was only after I had it all cut out that I thought of Grease mainly because I was searching for a sentiment and came across "Summer Lovin" in Pink by Design's "Simply Everything" set!   


It all fell in place after I picked the sentiment.  I thought of the scene, and used a random cloud shape cut out of scrap paper, some random foam, and Distress Ink in Broken China to make the clouds in the background.


After I took the pictures, I actually tried Glossy Accents for the first time for the windshield.  WOW, that stuff is amazing!  I wasn't sure if I was going to mess up the card, but it came out pretty nice.  The silly thiing that I did was leave the black steering wheel uncovered.  Haha, in most cars I've seen, the steering wheel is also behind the windshield, so that should've been covered too!  I did fix it later on, but it wasn't as smooth.  Now I know for next time!

Here are the challenges that I'm entering:
- - - - - - - - - - - - - - - - - - - -


Weekly linking party at You Had Me @ Craft!  I love these linking parties because it really gives you a chance to find new bloggers to follow! I have a TON already in Google Reader, but when I finish going through them all, I'm always sad and want more.  Join in for some fun!

Tuesday, July 26, 2011

Embracing Rachel F.

Is anyone else out there feel the way I do when it comes to crafting after a long break?  I want to get back into it sooner, but then I get distracted by blogs and message boards, and part of me doesn't want to deal with the "work" involved with crafting.  Haha, for me, that work usually means clearing off all the things on my table and in front of my Cricut if I'm using it.  However, once I start crafting again, I wonder how in the world I took a break from it at all!  That happened once again today!

I've mainly been waiting for my shipment of Copics to arrive (yes, I finally splurged and ordered 21 from Scrapbook.com what with the price increase in August), so I haven't wanted to do much.  But that's also why I love that I have my Cricut and I'm interested in digi stamps too.  I  can switch from one to the other depending on my mood.  Today was definitely a Cricut day!

The challenge over at the Cricut Cardz Challenge blog was to make a card using a monogram (initial) and any colors or cartridges.  When I saw this, I immediately knew that I was going to make an "F."  My last name now starts with an L, a lovely lovely L.  That's all going to change when I get married next May.  I will then be Rachel F!  At work, my students might start calling me Mrs. F instead of Miss L!  Ahhh, that'll be a change!  Well, that's why I decided to EMBRACE the F that will soon be part of my name ... or at least embrace it for this challenge!


I also used pink and green because those are our wedding colors.  They're not exactly these shades, but it's what I had on hand.  This is the Recollections cardstock in the packs that can be found at Michaels.  I love them.  They cut so well in my Expression!  Once I had the letter and shadow cut, I followed the sketch from Card Patterns.


 As you can see, I elongated my card since I cut the "F" at that size.  The punch is Apron Lace by Fiskars.  The ribbon was attached to the back of the white cardstock, and then I used the really cool ribbon tying method by using a comb.  There's no way I'd be able to tie little bows like that if it weren't for the comb method.  Search for it on YouTube if you don't know what it is.  Some people even make tinier ones by using a fork!


I was actually going to use a patterned paper somewhere on this card, but I think it would've messed up the look of the card.  I love that there are so many different things to do and use when it comes to crafting!  I keep trying to get myself to use pattern paper when I make cards, so it was nice being able to just use solid cardstock for this one.  Simplicity, right?


Anyway, that's my monogram card!  Obviously my fiance Howard is going to see this post, so it won't be a surprise if I write in it for him.  I think he'll still be happy to see that I chose F for this challenge instead of L though!  (BTW, sorry about the photos.  I'm uploading from my netbook, and it's harder to cut out the background, so I just left them as is.)

Here are the challenges that I'm entering:

Monday, July 25, 2011

Inspiring Others!

Yesterday after service, the college and early career group members were meeting downstairs in my church's basement for Sunday School as we always do.  One of the guys who just graduated college and is going into law school or something law-related, I believe, arrived and said, "Rachel, I have to show you something."  I was like, "You have to show something to me?" as he searched for whatever it was on his phone.  These are the two things that he showed me:


Haha, he had used my cards as an inspiration to make his own cards to give to people!  I thought it was hilarious and also very flattering!  Here are the ones I made:

(This is actually the FIRST card I made when I got my Cricut using Simply Charmed, so the sizing of everything was so off, haha.  I still have it in my card box!)


I just HAD to share it with all of you!  Though I may still feel like a newbie crafter since I'm still learning about my own style and personal tastes, it warmed my heart to know that someone was looking at my work and actually being encouraged by it!

Wednesday, July 20, 2011

Check out By Lori Designs!


I follow a lot of blogs using Google Reader, but there are a few that I go to often and check without even having to check my Reader.  By Lori Designs (BLD) is one of those!  She has a ton of really cute digital stamps; my favorite are the Puddle Jumpers.  Well, let's be honest, I love the Lollipops too!  It's great that her images are very easy to use when it comes to things like paper piecing! 


Not only does she have great images, she also has a creative Design Team.  I like seeing their bright, cheerful cards and using them as inspiration.  Check out the site!  You'll be happy that you did!

Tuesday, July 19, 2011

POPsicles!

The card I'm posting right now is actually one that I'm VERY happy about because of how it looks and because I "allowed" myself to keep it simple.  I see so many cards and think that I have to have fantastic layers with different patterns, and although I do like those a LOT, I still like the simple and clean designs as well.


There were challenges that wanted a cool, sweet treat, and I immediately thought of popsicles because of the fact that they can be done in so many different colors!  It was easier for me to do this than ice cream cones or other treats.  Originally, I cut out 4 popsicles that had bites taken out of them from the Simply Charmed cartridge.  Then I realized that it would be cuter to have 3 full ones and only 1 with a bite taken out of it!  So I turned my Gypsy back on and cut them out again.  Boy, I just gotta say that I love my Gypsy because I'm using the tiniest scraps of paper for these cuts!  They were only cut at 1.75 inches!


Once I glued them to the sticks (and I finally opened a new Zig 2-Way glue pen ... man, I've missed having a lot of glue come out freely!), I knew it needed something more, so I pulled out my Martha Stewart glitter.  Since the pieces were so small, I didn't have to use my Mod Podge.  I just used Zig!


I love the added glitz of the glitter!  I actually had to take a ton of photos of this card because I wanted to make sure I was able to showcase the detail as well as get the glitter to shine!  I know I'm not the greatest photographer, but I think you can see it better in the above picture.  I added a sentiment from Pink by Design's "Love Always" set.  Anyway, I'm loving the simplicity of this card.  What do you think?

Here are the challenges that I'm entering:

Pink Pink Pink!

I love being able to switch from cards made with the Cricut to cards made with digis!  It always takes me a while to get into it though.  It's probably because I haven't yet cleaned up the mess I made from my previous project, haha.  Well, after I tidied up my desk and my floor that was covered in scraps (I cut them down to usable pieces), I worked on this card using a Pixie Dust Studio freebie called "Pixie Pie is catching hearts."


I used the sketch at Tuesday Morning Sketches to plan out the layout of my card.  It was a pretty easy sketch to use mainly because it was a rectangular card!  Those of you who have been following me for a while know that circle and shape cards are difficult for me!


The first thing I did was cut out Pixie using my Nestabilities.  I also embossed it.  I love that these dies can do that as well!  It really gives it a little extra something.  Then I colored Pixie in using the Crayola + baby oil technique (hair, skin, and light pink part of her dress) as well as Bic Mark-It makers.  I recently remembered that I had like more compact "Q-tips" that I had never used for makeup from my aunt's wedding years ago.  They don't fuzz up like Q-tips do, and they have a point on one end.  I'll have to go to the drug store to get more of these!  I'm loving how easy they are to work with!  Plus, I'm sure they're much cheaper than whatever products are sold at the craft stores!  Don't get me wrong; I love Michaels and AC Moore.  I just would rather spend my money on other things if I can get inexpensive tools at CVS or Rite Aid!


Though the above image isn't a clear picture, I wanted to post a close-up picture of Pixie's boots.  Using just one color of my Bic Mark-It markers, I tried to achieve a shadow-type or blended look.  Can you see that the center is lighter than the rest of the boot?  Haha, maybe I'm just getting excited over something so minuscule and silly.


I did want to post and showcase the picture above because of those teeny-tiny bows!  Aren't they just awesome?  I was able to do them using a comb I had in my room.  I watched those YouTube videos on making small bows with a fork, and I was able to do it myself even though it took a while to get used to handling such thin ribbon.  In this close-up, you can also see that I should probably get a new pair of Cutterbee scissors to use JUST with ribbon as many suggest as my scissors aren't sharp enough to cut without leaving those little fraying edges.


Well, that's my card!  What do you think?  Even if it's not the best of the best, I think it's still an improvement from my first Pixie card (you can see the card I made with this same image here)!

Here are the challenges that I'm entering:

Friday, July 15, 2011

Guys Don't Make Passes ...

... at girls who wear glasses.  Or do they?  Hehe, of COURSE they do, otherwise I wouldn't be engaged right now!  Although ... Howard did date me when I had contacts ... just kidding!  On the Saturdays that he just comes over to hang out at my house, I usually don't bother with contacts.  Too bad I don't look as cute as Leslie does with her glasses!  That's why when I won the Karber Challenge #35 (woohoo!), I asked for "Thinker Leslie" as my digi prize!


The first thing I did when I was ready to start coloring her in was to color her glasses pink!  The reason for that is because when I was in elementary school, I got my first pair of glasses that were P-I-N-K!  Yeah, I'm not quite sure what I was thinking, haha.  Leslie can surely pull it off though!


I had a bit of a harder time coloring in Leslie as opposed to Millie since Leslie's lines are thinner.  That's why it's not blended as well.  I do wish after the fact that I made Leslie's hair darker too.  [edit: I emailed Berenice at Karber about the lines, and she emailed me back right away and told me that a lot of crafters actually prefer the thing lines to showcase the coloring.  Now that I hear that, I do see that there's a different look to Leslie because the lines are thinner.  Of course, I'm still in preschool when it comes to coloring, so that's why it was harder!  Berenice was kind enough to send me a Leslie in a thicker version!  YAY!  Now it'll be easier to stay within the lines, hehe.  Can't say it enough how much I <3 KARBER!]


I used Nestabilities Labels One to cut out the white cardstock, and this was the first time that I embossed it too!  I've seen videos on it, but I never tried it myself because I didn't want to bother figuring out the sandwich.  I had a mat (not the tan mat, but the Sizzix black mat) and used that along with 2 pieces of a cut up cereal box.  Those things added to the embossing B plates worked really well!  It adds something extra to it, I think!  

I used a Papertrey Ink die for the pink label, and I hand cut the white one behind it.  I initially had a different sentiment on it, but I didn't stamp it that well so to fix it, I actually stamped the "Love you bunches" (from Pink by Design's "Our Kids") on a white die cut and adhered it right on top of the first sentiment!  I actually like how it looks a lot more than the original!  It's the first time I had 3 layers for the sentiment!  It's all about learning and experimenting, right?

Here are the challenges that I'm entering:

Wednesday, July 13, 2011

Attempting Two New Techniques

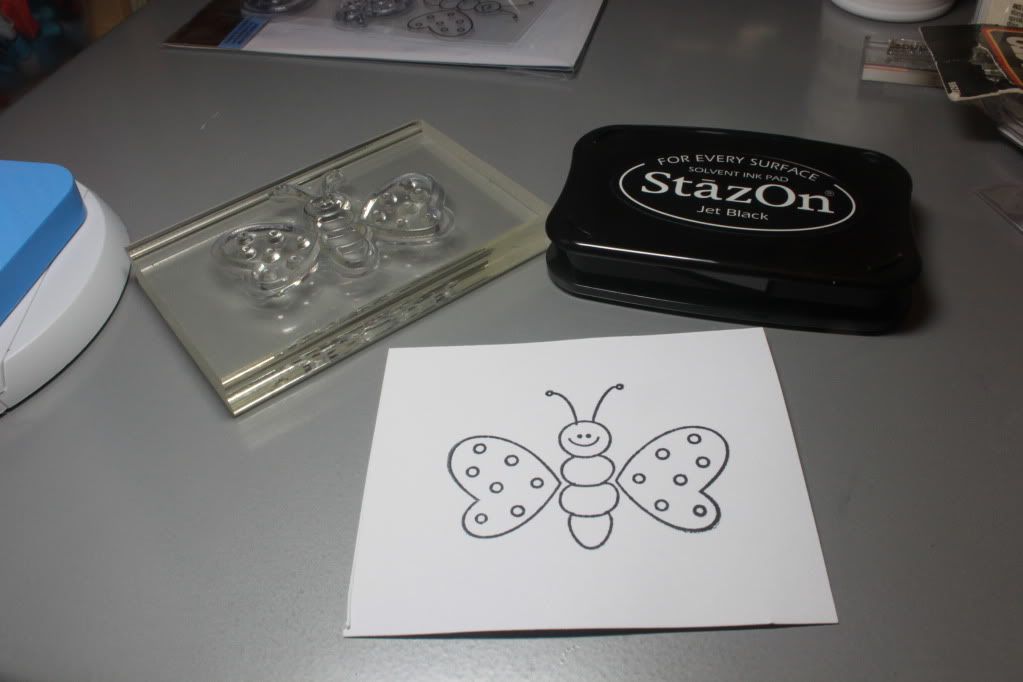
You'd think that I'd try to master one technique before moving on to the next, but I can't help it!  I follow so many blogs that showcase these great fun things that I have to try it for myself.  The first method for card making that I wanted to try was paper piecing.  Basically, instead of coloring in part of a stamp or image, patterned paper is used instead to fill in the space.  I tried it for the first time last night with a Recollections stamp set that I bought from Michaels called "Don't Bug Me."  I had it for a while, but I never actually used it yet.  I figured the butterfly would be perfect for paper piecing.


After I stamped it on white cardstock AND on patterned paper, I realized that the butterfly wasn't going to work because it already had a pattern on it ... 


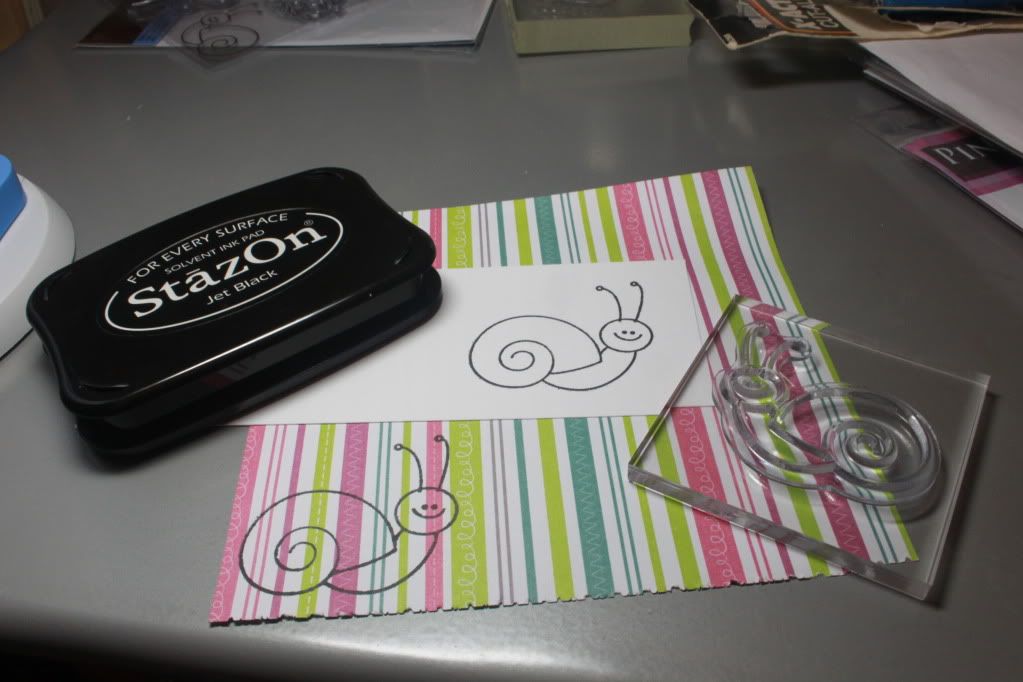
Let's try again!  This time I chose the snail.  Posting this is going to totally ruin it for my fiance Howard because he'll see this before it's used!  Recently, he told me a relativity joke involving a snail that got me cracking up for the longest time.  I won't tell it as well as he does, but here goes: A snail went to the police station.  He said, "Officer, officer!  You gotta help me.  I was just mugged by a turtle.  He took everything I had; you gotta do something!"  The cop said, "Calm down; it's okay.  Just tell me what happened."  The snail then replied, "I don't know; it all happened so fast!"  HAHA.  Okay, I'm going to guess that I'm the only one laughing, but Howard built it up with this story that I was so surprised with the abrupt ending, but once I realized the joke, I couldn't stop laughing!  Haha, but I digress ...

I stamped the snail on white cardstock as well as patterned paper.  And yes, for those of you who follow my blog, you may notice this piece of patterned paper has been used before a few times.  Yup, I really do try to use the paper until it's done before starting a new one!  Besides, I LOVE this pattern!


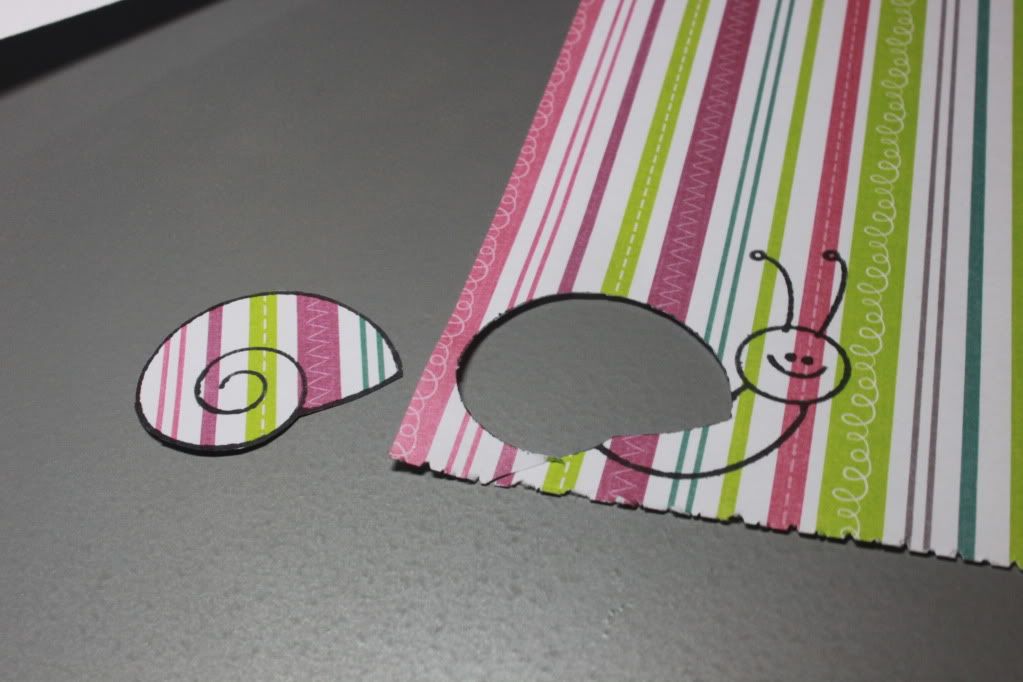
The next step was to cut out the shell from the patterned paper.


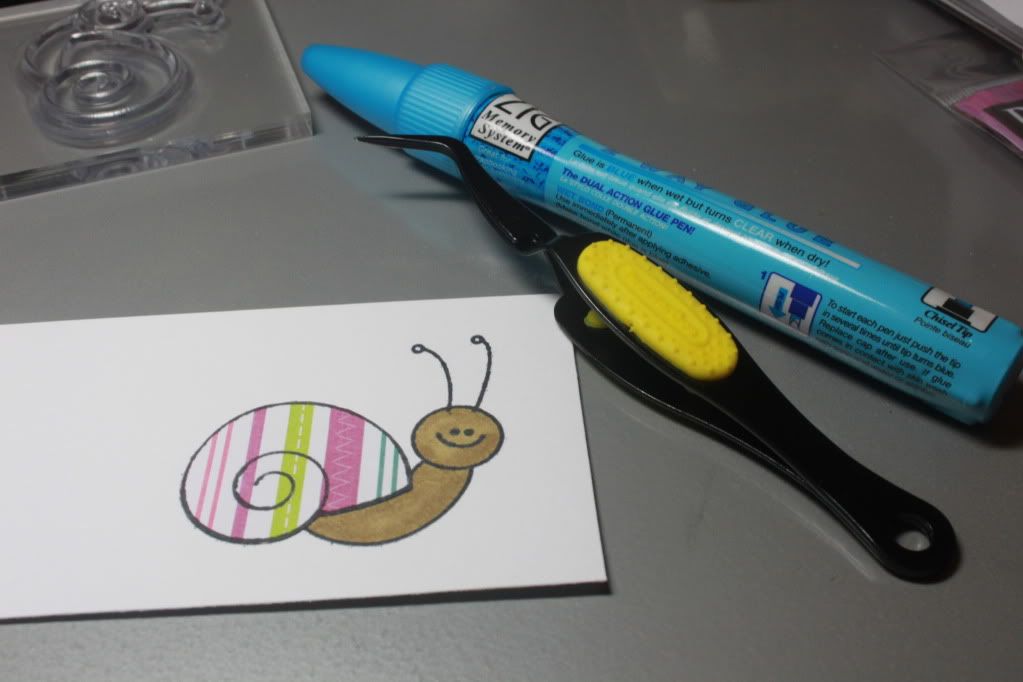
I colored in the part of the snail that would show.  Then I used my Zig 2 Way Glue pen to adhere it to the white cardstock.  I used my lovely Tweezer Bees too because I love those things and have so much more control when I work with little pieces!  I've gotten so used to working with them that when I try to do something without it, I feel as my fingers are just really chubby kielbasa or something.


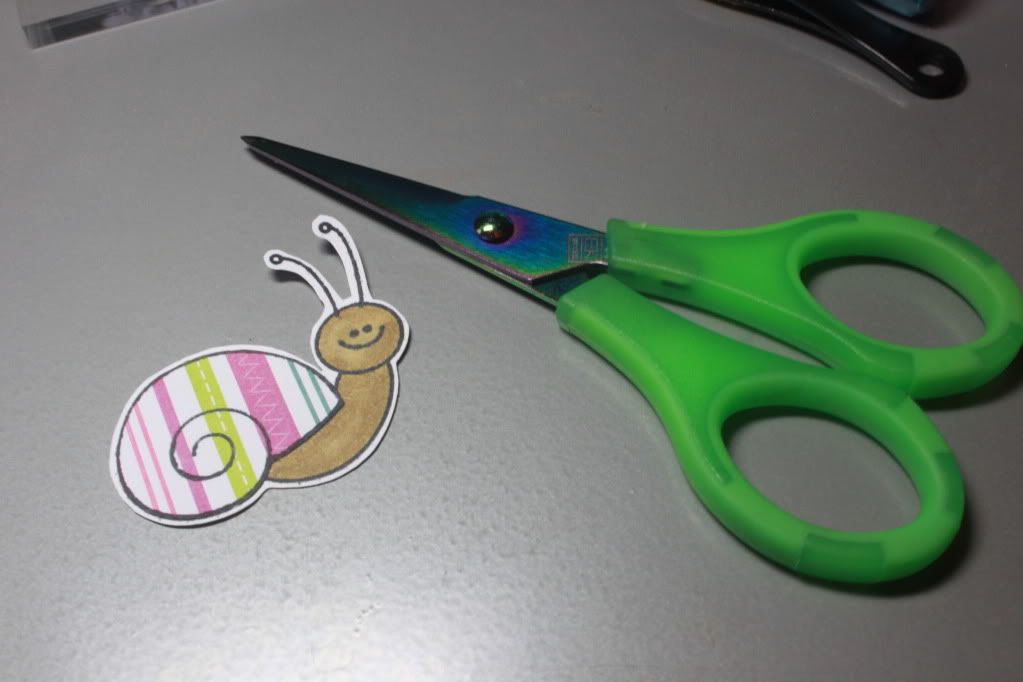
Then for the last step, I cut out the entire snail as one piece.  And of course, I used my Cutter Bee scissors!  I got these scissors a LONG time ago before I got into Cricut-ing and digi stamps.  I actually used it to cut out regular stamped images way back when I made cards growing up.  I didn't imagine that years down the road, I'd have so many of these EK Success products.  Feels like the right time to say that I love my Cutterpede trimmers.  Yup, BOTH of them!  I have the 12 inch and 5 inch; I use the latter if I can just because my desk is so small.


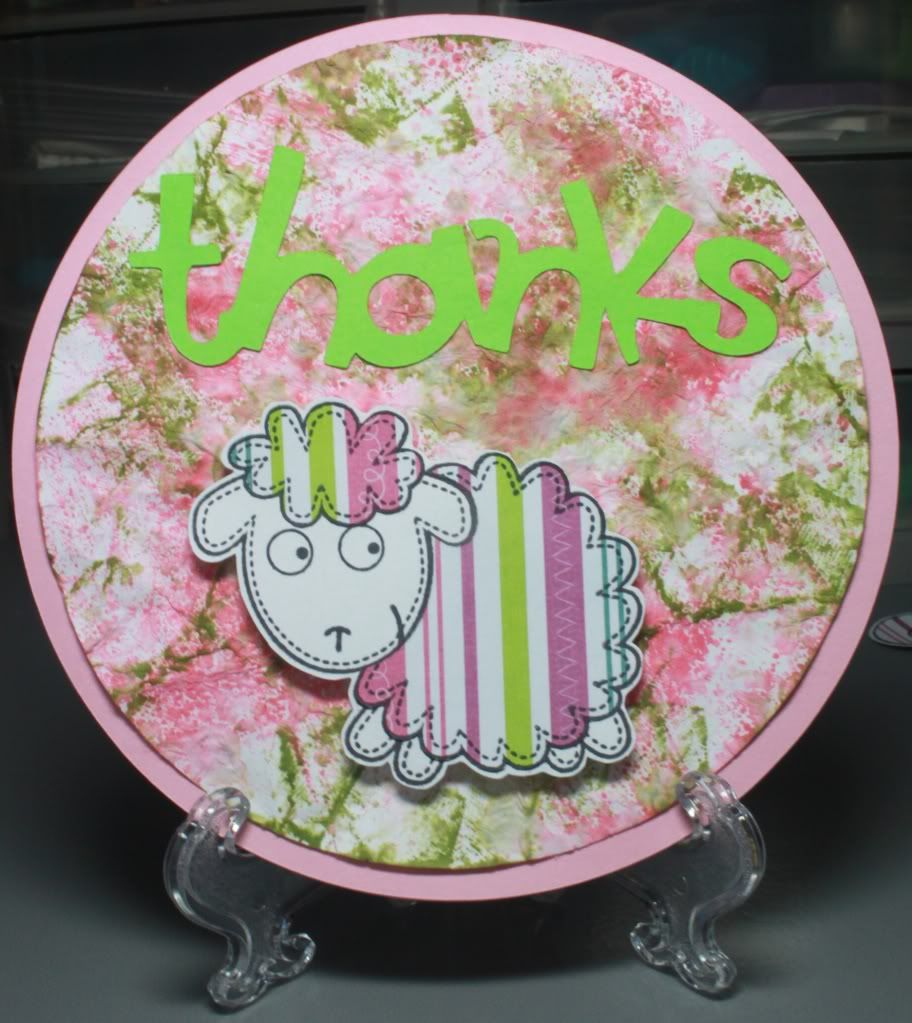
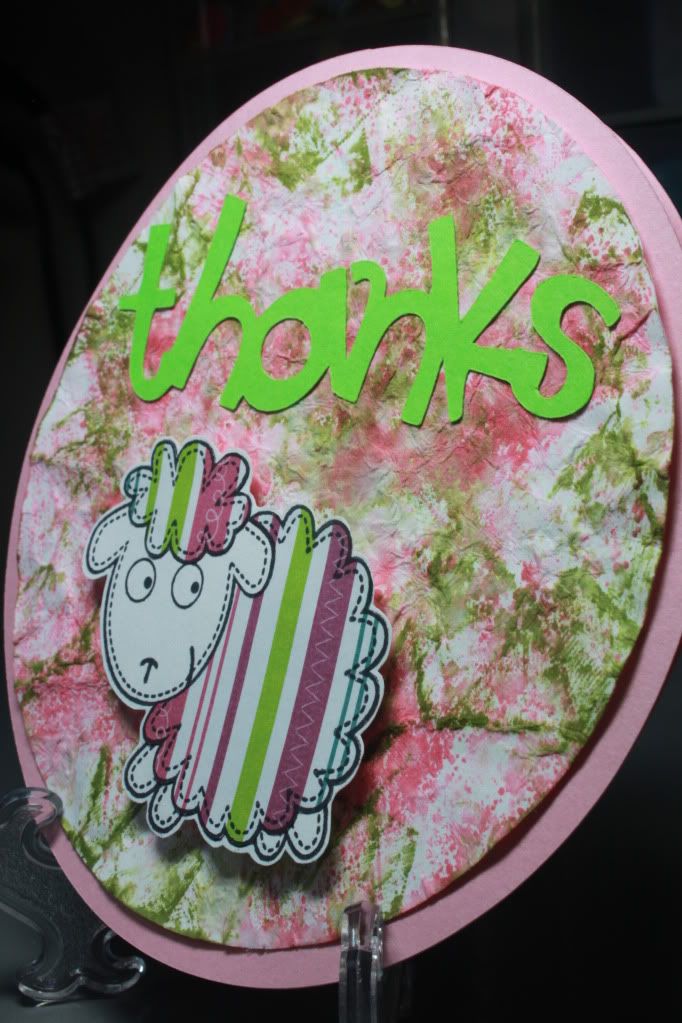
The next step would be to use it on a card, of course, but I ended up going to sleep.  Haha.  This morning I decided to try paper piecing again, and this time, I used the cute sheep from a Sandy Lion stamp set.  Next time I'll look for different paper, haha, but I still have a little bit left of this striped one!


As you can see, my second attempt at a new technique involved using the Ranger Distress ink pads.  I used my Worn Lipstick and Peeled Paint and put some of that ink on the new craft mat that I bought.  Then I sprayed water on it and stuck the paper in it.  I had to put more ink down because it wasn't enough to cover it.  It still wasn't completely covered, so I put ink directly on the cardstock and sprayed that before crumpling it.

Um, I'm guessing it would've come out better if I had the little mini misters instead of using an actual spray bottle ... haha.  That's going on my "to buy" list.  Even so, I still think it came out pretty cool.  I don't know that it fits that cute lil' sheep, haha, but I think I'm going to have fun with this craft mat and the distress inks!  I really should've watched a video before attempting it.  That's usually what I do before trying something new, but I was already in my room, so I did this from memory.


I guess I did do one more new thing here too.  I actually welded the letters together on my Gypsy to create the sentiment!  I used one of the fonts on Cuttin' Up and I turned every other letter left and right before welding it.  That's pretty awesome!  I'm going to love welding for scrapbook page titles!  Hmm, come to think of it, I should've just put "thank" because then the sheep would've been the you/ewe!  Oh well, maybe next time!

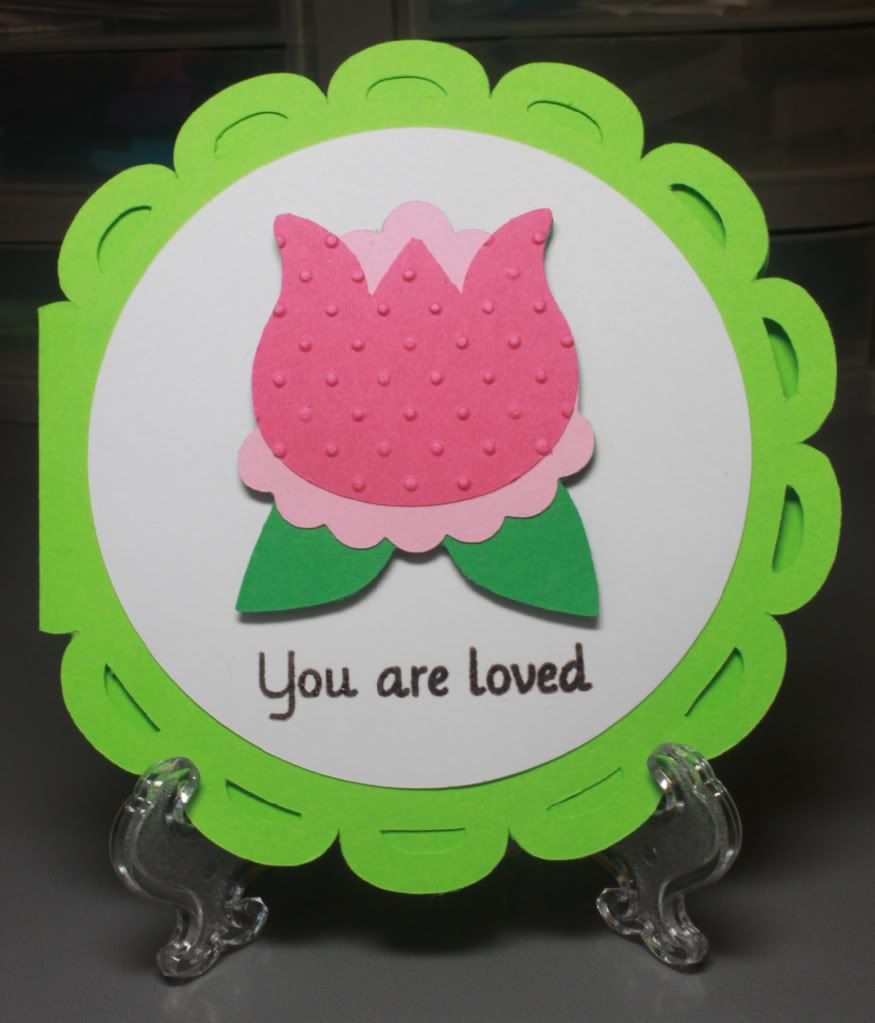
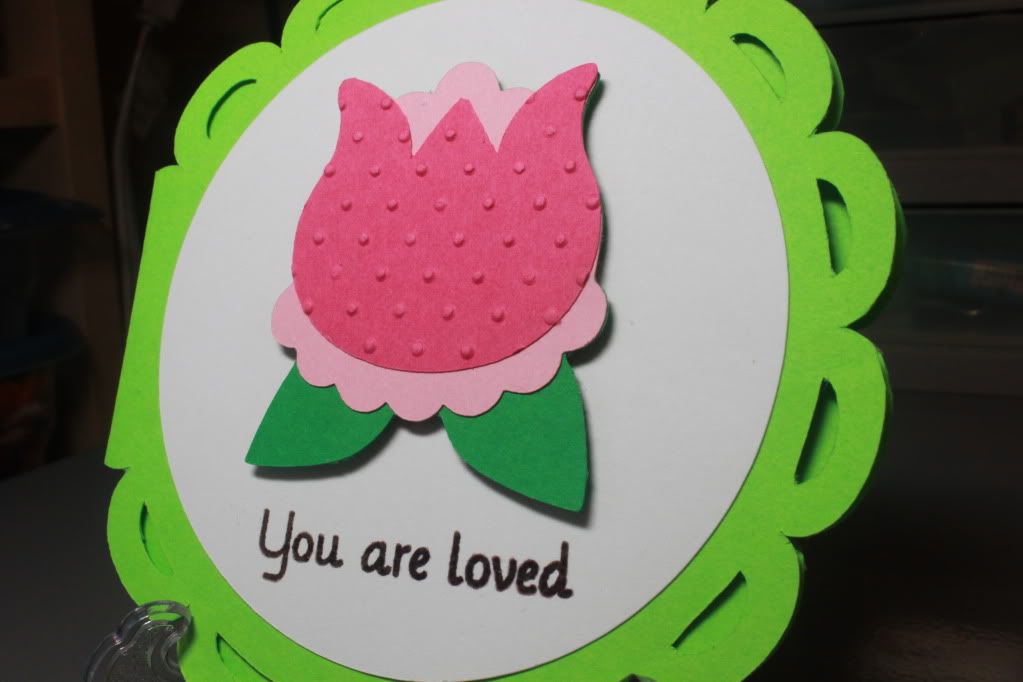
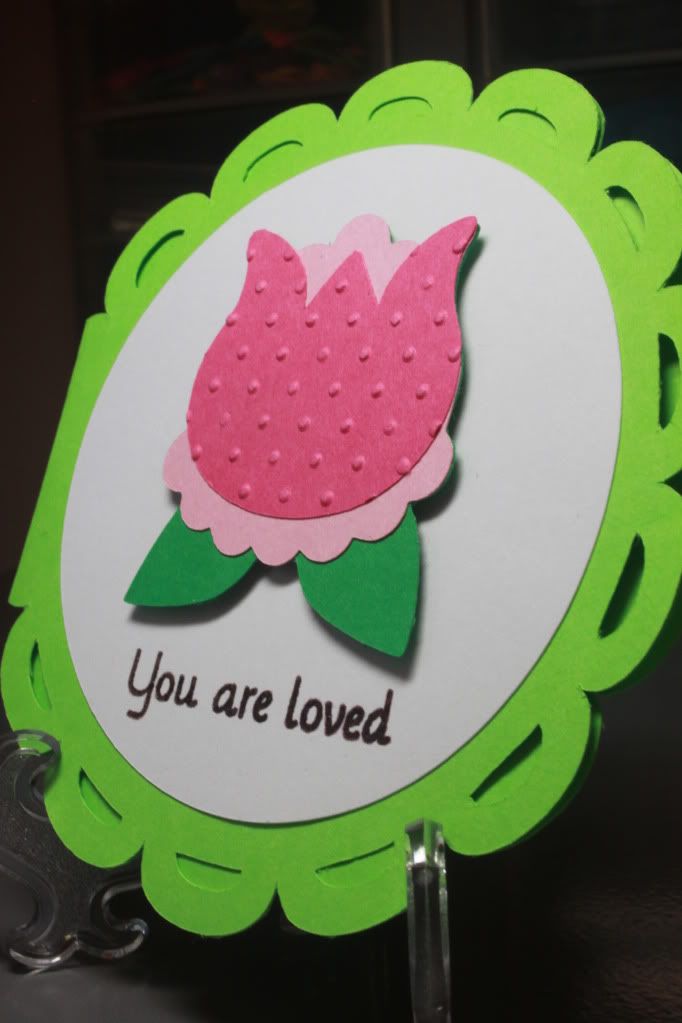
Here's the challenge that I'm entering:

Challenge: Simply Charmed + Wild Card + Embossing!

I think it's so fun to jump back between digital stamps and the Cricut.  It's way easier to use my Expression now that I finally have a Gypsy!  I haven't posted an update about that yet, but yes, I do have one now!  Yay!  I can play around with sizes and hide features and weld.  In the end, it saves a lot of paper!

For this card, I used a flower on the Simple Charmed cartridge because the MAG challenge asks for a certain page.  It's actually a pretty fun challenge because it "forces" me to use things I may not have used before.  Now that I've actually used it, I think I might reproduce this flower for those "any occasion" cards!  If you know this cartridge though, there are a lot of cutesy faces on them.  That's the reason why I bought it in the first place.  However, I've found that it's difficult to cut them cleanly when the size is small.  That's where the "hide" feature comes in on the Gypsy!  I hid the face for this cut, which also eliminated the need for the black layer.


I used the scalloped circle from the Wild Card cartridge again because I intended on entering this into another challenge that required a circle.  Of course, silly me didn't realize that it was a circle card AND thank you card.  Blah.  If I had read it carefully, I would've just used thank you sentiment and been able to enter that too!  Oh well.  I'll just do it tomorrow if I have time!


I did emboss the outer layer of the flower with the Cuttlebug Swiss Dots folder.  It's kind of the go-to folder for any embossing need!  I actually also embossed the sentiment with my Ranger clear embossing powder using Stazon Timber Brown ink.  I might get back into heat embossing again!  I've read that the Ranger  holographic embossing powder can be used to make it look as if the paper is glittered paper, but I digress!  The sentiment is from Pink by Design's "Our Kids."


After I was done, I actually wasn't happy with it.  Then I went downstairs for dinner.  When I went back to look at it, it actually started to grow on me!  I guess I'm so used to having it a big busier, but this would work for certain recipients that I wouldn't necessarily be able to send a loud card to ... does that make sense?  I showed it to my mom, and she really liked it.  It's more like the cards she would send to others, so despite my initial thoughts on it, I do actually like the basic notecard look to it!

Here are the challenges that I'm entering:

Tuesday, July 12, 2011

Lily Pad Cards

I became a Member of Lily Pad Cards today! Go become a member for a chance to win a collection of Hero Arts stamps. Contest closes at 11:59 p.m. EST on Friday, July 15!


Monday, July 11, 2011

It Needs More Color!

Back in the middle of June, I tried my second scrapbook page.  The first layout I did was for an old visit to Liberty Science Center.  I had fun doing that one, so I thought, "It won't be that difficult to do another one."  Instead of attempting a trip (I have 2 Disney trips I'd like to eventually scrap!), I figured I'd scrap whatever pictures I liked.  I immediately thought about the first picture that Howard and I took after we got back together in 2008.  This was after our church's encore performance of the coffeehouse.


Well, it looked a lot better in my head than it did when I was done with it.  I initially thought that I didn't have to use many papers and that I could just use plain white 12x12 cardstock as the base.  Um, I think I see why people use colors and patterned papers now!  It looks boring with out it!  Despite how plain it looks, I am happy that I attempted another layout because I need to practice before tackling any bigger projects.  

I'm very glad that I now have a Gypsy because I'm going to be welding letters like there's no tomorrow!  It'll make dealing with scrapbook page titles easier.  Plus, I don't know much about sizes, so at least I can what it'll look like on the Gypsy!  

Just like I use sketches to make cards that differ from my typical same ol' same ol' cards, I think I need to use some sketches for scrapbook pages too.  The only thing is that I want to have more room for journaling than what most people do.  I used a journal template for what I wrote because I wouldn't want to write it freely because it'd be too messy.  I also want to fit more pictures on a page if necessary.  I'm not an embellishment kind of girl because these will be going into page protectors.  

I guess it's all about learning and practicing, right?  Anyway, as weird as it seems, this plain page actually makes me happy because I think about how it'll look years from now after I HOPEFULLY get better at it!  Any suggestions?  Any scrapbookers out there?

Thursday, July 7, 2011

Challenge: A Sketch + Anything Goes Theme!

After having been away from crafting for a while due to our church's summer retreat, I was really eager to get back into it!  I admit that it took a while to get used to it again though.  I kept thinking about it that I was actually kind of afraid to start!  I was sure I'd mess something up, but thankfully, it was still just as fun as I remember it!  I decided to make some cards for challenges when my mom asked if I could make a card for my cousin's birthday.  I was able to combine his card with 2 challenges.

The image I picked was from Pink Cat Studio.  I recently purchased the Dinosaur Value Pack #1 that included the image "Rex Loves Cake."  Perfect for a guy's birthday card!  That's why my mom had to ask me to make one; most of my cards are kind of girl-focused.  I colored him with Bic Mark-It Markers as always.  Since I've been away from the markers and shading for a bit, I wasn't entirely happy with how it came out.  I was going to keep adding layers to get it to blend better, but I was afraid that if I did, I'd mess it up and have to start all over again.  I do think, however, that it does look better on the card than it does in this close-up picture.


Then I followed the sketch challenge over at deconstructingjen.com.  My use of the sketch and my coloring skills is nothing like those posted there done by the design team, but gosh, I do like trying!


This is the final result!  I cut the cardstock to make a 5in square card, and I worked with what I had for all the separate pieces.  The base cardstock and the white layer were the only two "new" pieces I cut into.  Everything else was from my scrap basket.  It's actually easier for me to do it that way because otherwise I'd be going through tons of paper stacks to try to find something that coordinates.  In actuality, I did try to combine another challenge involving dots with this one, but I could not find masculine polka dot paper!  Haha.


I used the thinnest foam adhesive square that I had just to add some dimension without being too out there.  For some reason, I think that guys don't want it to be popping out that much.  I have no clue what I think that!  


I used a Bic Mark-It maker for the dashes on the green circle, and I used my Recollections "Snow" Opaque Marker for the white dots on the blue square (easily cut out with my Nestabilities).  The sentiment is from Pink by Design's set "Take the Cake."  I realized that I should probably buy the "Happy Birthday" set because I actually only have one sentiment stamp that says it!  Everything else is a pun or something cutesy.  


I like that the card opens from the top.  I think it's fun when cards do that, haha.  Is that a weird thing to say and think?  Hmm, what else can I tell you about this card?  Oh, I tried to use a stamp and VersaMark to get some dots on the green paper, but it just looked funny, so I had to throw that piece away.  Thank goodness I only needed half the circle!  And the full circle was actually cut in a card I posted last week or so when I made the circle card for the latest Karber challenge.  I may cut and "make a mistake" in that I end up not using it on that card, but I will end up using it eventually!

Here are the challenges that I'm entering: