
Monday, August 29, 2011
Goodbye Irene!
Praise God that Irene is gone! Phew! We didn't suffer any damage to the house, and we didn't have any flooding either. We lost power from 5pm last night to 10am this morning, so 17 hours without electricity was the worst of it. I'll write more some other time. I'm just happy to be online again and catching up on blogs! And yes, during the power outage, I did craft by flashlight! I'll post those soon!
Saturday, August 27, 2011
Hurricane Irene
It's kind of surreal to know that there's a hurricane warning in effect and that there's a mandatory evacuation in NYC for zone A and part of zone B. Thankfully, I'm in a no evacuation zone so even if it gets bad, we stay at our house. We're far enough from the water. That doesn't mean I'm not terrified of the wind damage. I keep thinking that the windows are going to shatter or something (I don't know if I'm overreacting). I'm in the process of cleaning my room now so that just in case something like that happens, glass won't be mixed in with my stuff, and it'll be easier to clean. If everything's a-okay thereafter, I'll have a clean room before the new school year starts (always my goal each year, but it doesn't always happen!).
Today does seem like a crafting day though. I mean, at this point, we're all just waiting around. My church is already closed tomorrow, although we wouldn't have gone anyway due to the fact that we have to cross 2 bridges to get there (and one of those bridges is scary even when it's just windy on a regular day). I'm not sure if I should pack away my Cricut. I can easily just stick it back in the box and put it on the other side of my bed so at least it's not exposed. Maybe if I can craft later, it'll be a lot of stamping or cutting cardstock for mini cards.
I do have to say that it is strange to see "normal" things going on when I look at social networking stuff. Most of my friends on Facebook are in NYC or on the east coast, and some have evacuated or are getting prepared for evacuation just in case Bloomberg calls for it. However, it's "interesting" to see other crafting posts or things on Twitter about Disney World. I guess it kind of keeps me a little sane too.
My older brother is home for the duration as he lives in an area that's easily flooded. His apartment should be okay because he's a few floors up, but his car would've suffered damage. It's just odd knowing all the things that are being done in preparation. The MTA is being shut down, which is crazy because even in snow storms, the MTA is usually still running even if it's limited service. I mean, snow doesn't affect most subways. The bridge tolls have been eliminated to aid in early evacuation.
And while all this is going on, I'm sitting here on my bed, typing up this blog post, and thinking of the worst of it that is still hours and hours away. Praying for everyone's safety!
Thursday, August 25, 2011
Animal Mini Cards Set!
What a busy few weeks it has been! My church had its annual coffeehouse on August 13th, so I was busy heading out to the city for rehearsals. Even though it's been a while since the performance and the encore, I wasn't able to do much crafting because I was doing a lot of sleeping! Here's a picture of one of the scenes from the musical that my cousin wrote.
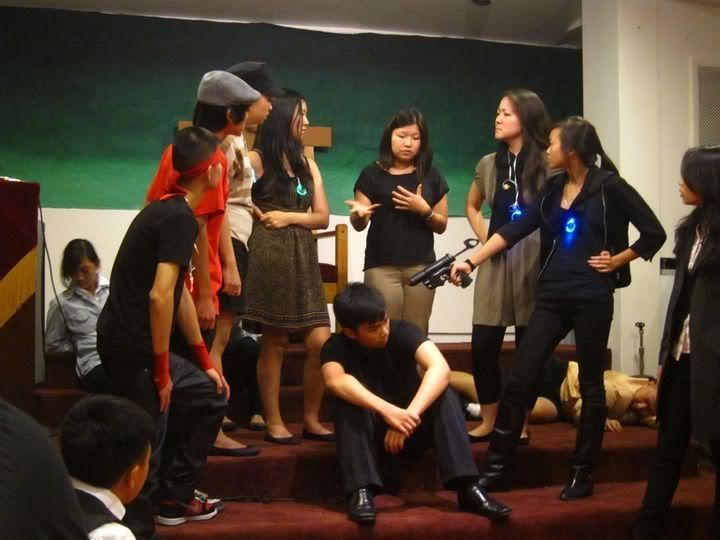
I'm the one to the right of the girl speaking. I'm wearing the dress with leggings and the scarf. Basically, the musical was about "Peacekeepers" that have super powers to keep a city safe, but things were going downhill as talent stones (what we were wearing around our necks) were being stolen. In this scene, we had just defeated a bunch of the "bad guys" and were questioning them. My character was "Chief," so I was the leader of the group. It was so much fun being able to serve with all of these people at my church even though I was pretty much one of the oldest! Most of the those that were involved are in high school or just graduated high school. I loved being able to get to know them.
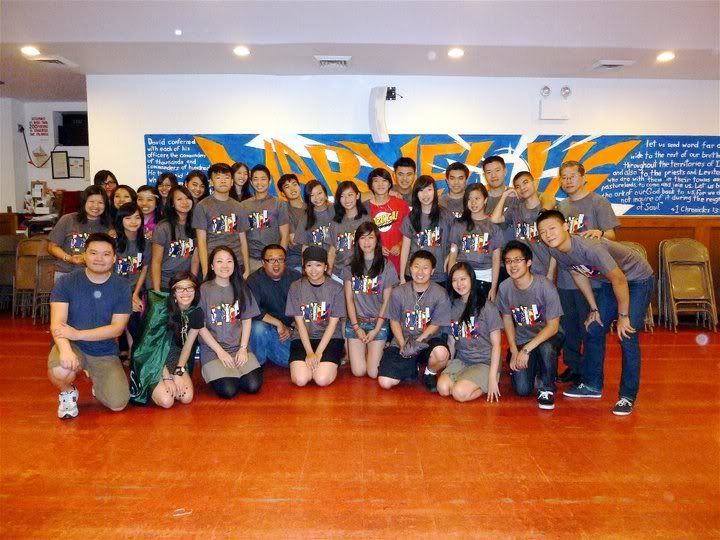
By the way, our shirts were awesome. They were designed by my fiance! He's the one kneeling on the left side of this picture. He's not actually wearing the shirt now because he was taking care of the sound board throughout the musical, and he didn't sing with us during the finale ("When You Believe" from Prince of Egypt).
Anyway, because of coffeehouse, I hadn't crafted in a while, but I was able to get back to it this week! Yay! And I got back into it with full force because I made multiples. And by multiples, I mean MULTIPLES!
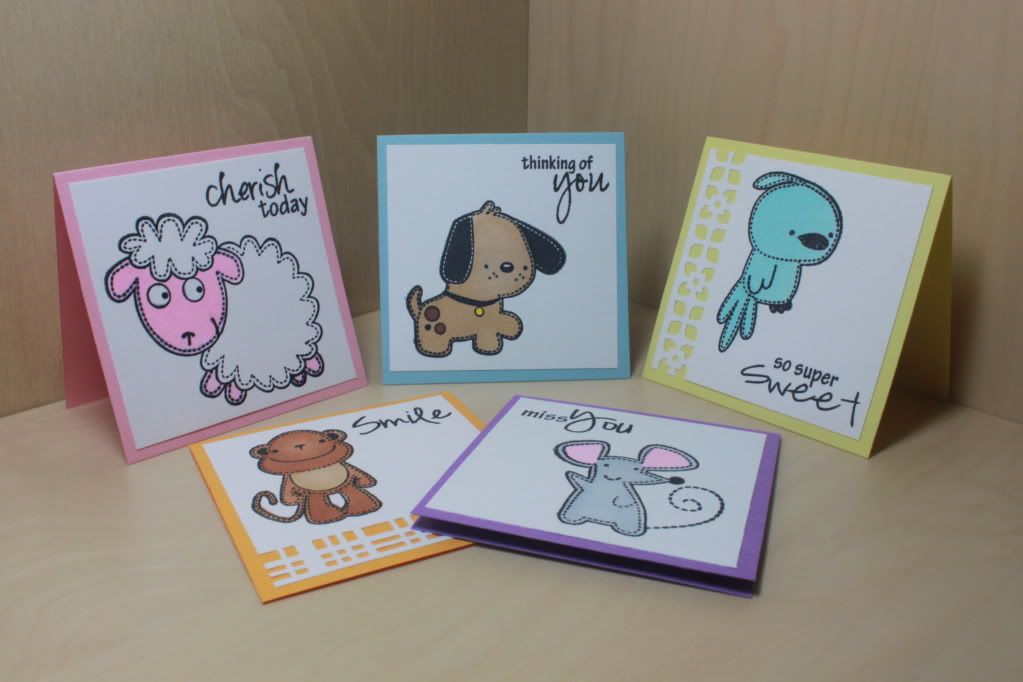
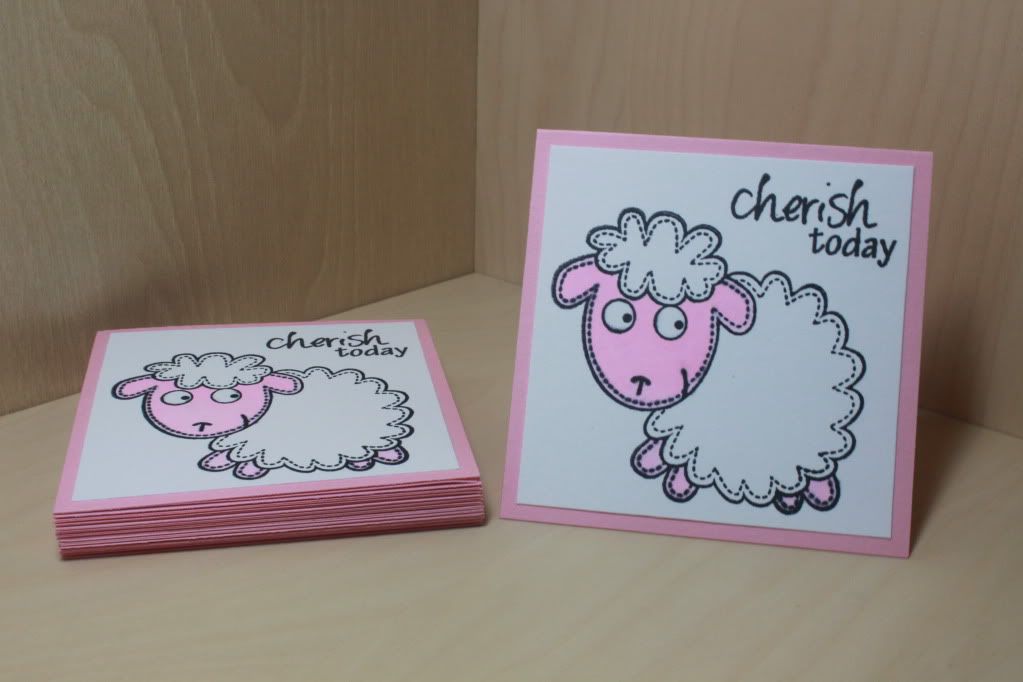
I made this mini card set using Sandylion stamps along with Pink by Design's set "Scripted Year." I kept the sentiments fairly simple so that they could be used for any occasion. Each card is 3x3'' so it's a nice square size. The white cardstock is cut at 2.75''. Since some of the animals were smaller, I used a border punch to add something extra.
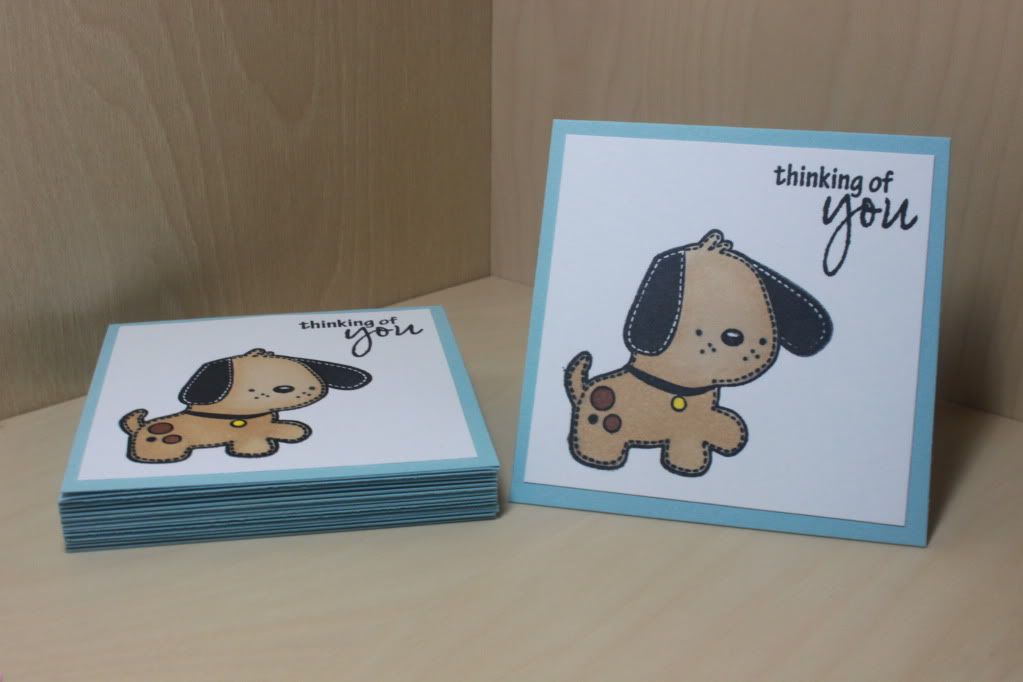
The puppy one is, I think, my mom's favorite even though she doesn't like dogs, haha. It is really cute though! Initially, I had this puppy all white, and I only colored in the spots. However, I tried one out with a lighter brown, and I liked it more as a whole especially as compared to the other cards.
For this sheep, I actually have 2 of them that are different shades of pink because I was testing colors. I forgot to stamp the sheep in Memento and instead used StazOn. I had to be very careful not to get everything to bleed.
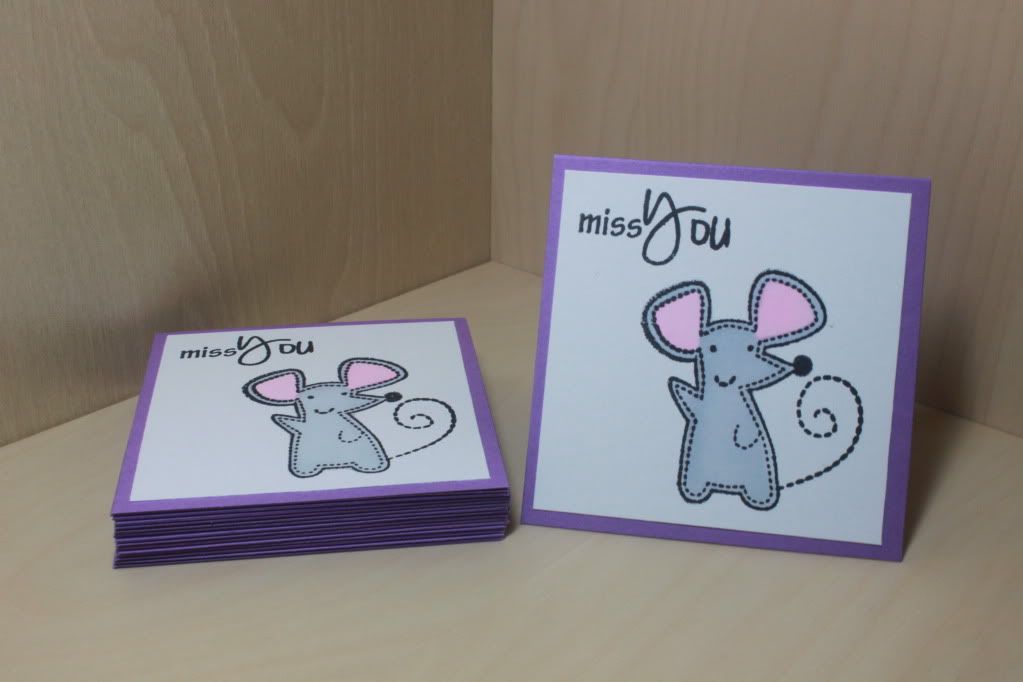
This mouse one might be my favorite but that could be because I really like the purple as the cardstock color. I was going to add a piece of cheese in its hand, but I don't know that it would've gone with the sentiment, haha.
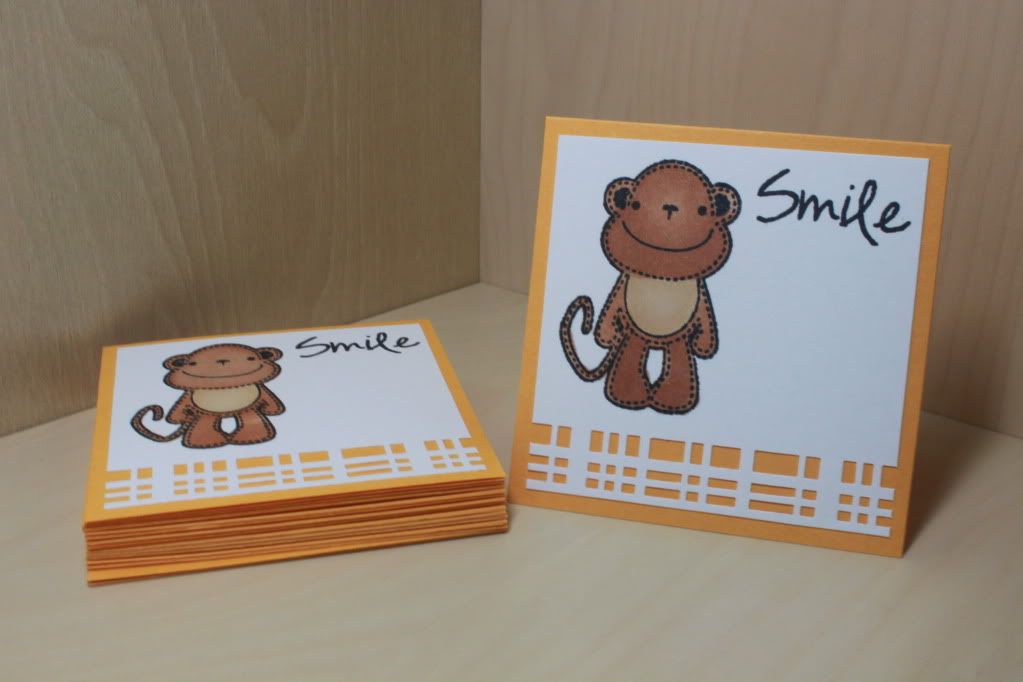
This monkey reminded me why I'm so glad I bought a bunch of different shades of brown when I purchased a few Copics. I remember the days when all I had was the brown in the Crayola marker set! It helps to have different shades!
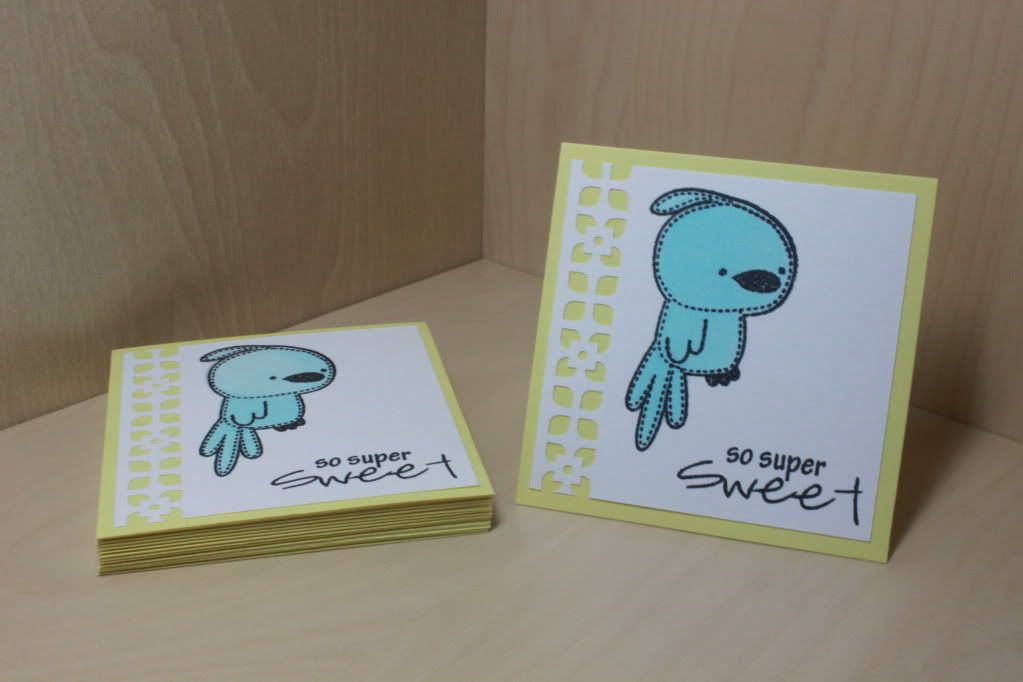
The last one that I did was this little bird. Thankfully, at this point, I used Memento to stamp, so I had no problems coloring this little guy!
I made 15 of each card and will be selling them as a set of 5. That means I have 15 sets to sell! I posted 10 in the store (I don't think all will sell, but I did already sell 2 sets!), and I think I'll be saving the other 5 for my church's bake sale in November. All proceeds go to the mission fund, and by then, I think I'll have a lot more mini card sets to sell! I'm so glad to be back into crafting mode! If only I had a clean room to work in ... maybe I should tidy up today considering the rain that's on its way! I was going to go to Michaels to pick up Copics with the 45% off coupon as well as some more Recollections paper, but I'd rather not go out in the rain. Rainy days just seem perfect for staying inside and crafting!
Jo Boogie's Blog Candy
Jo over at her blog is offering up this fun birthday blog candy! Take a look at her site! I'm a new follower, but I'm excited to be because her cards are so bright and fun. Look at her sidebar too to see all the design teams she's been on, all the awards she's won, and all the times she was published! Just wow ... I wonder if I"ll ever get to that point in my crafting career!
Her birthday blog candy closes on August 31st, so don't miss out!
Friday, August 12, 2011
Crafting Pause
Hi everyone! As you may have noticed, I haven't really been crafting and posting lately. The reason for that is my church is having its annual coffeehouse tomorrow and the encore performance is on Sunday! Since I'm one of the actors in the musical, I've been practicing my lines and going out to the city for rehearsal. Yesterday I didn't get back home until 11:50, and that was because my dad was kind enough to pick me up from the bus stop so that I didn't have to walk all the way home.
I'm about to head out for rehearsal in 10 minutes, but I just wanted to pop on by to say hello to everyone! Please keep those involved in the coffeehouse in your prayers as well as our guest speaker and all those who are attending! Pray that God opens all of our hearts! One big thing is the health of those involved. I don't write about it here, but I'm not in the best of health. I deal with a lot of gastrointestinal issues and take many pills a day, so I'm hoping it'll be settled for these next couple of days. Others who have solos are also feeling a little under the weather too with scratchy throats and congestion.
After all is said and done, and I can back to crafting next week, I might be able to post some pictures and a video or two! I hope you all have a wonderful weekend!
Tuesday, August 9, 2011
My First Mini Card
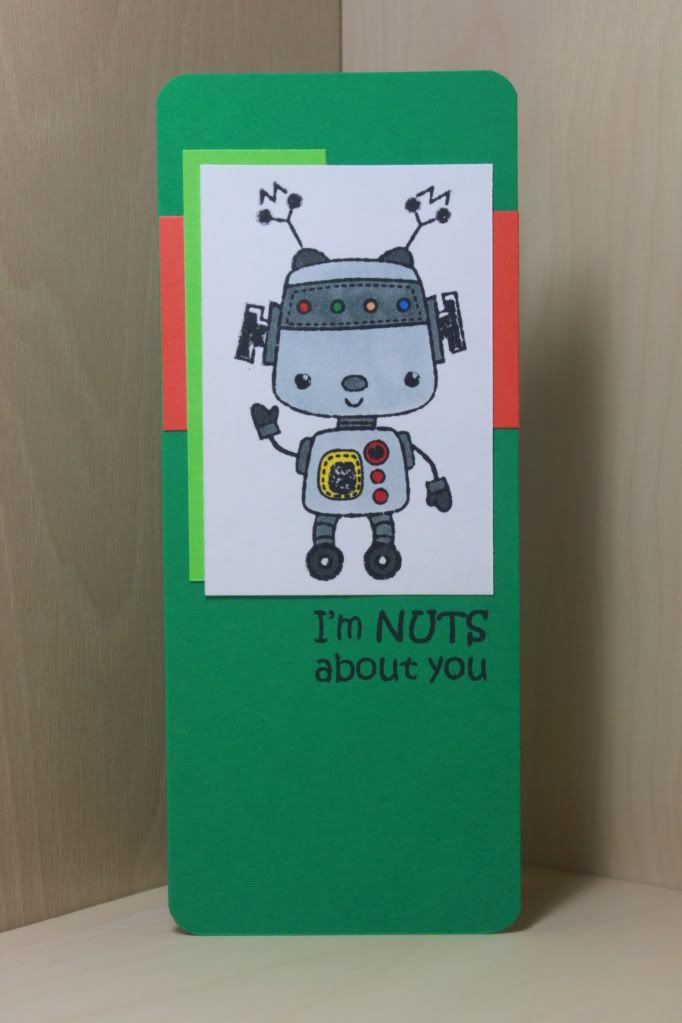
I want to make cards every single day, but there are days that I just don't want to deal with the hassle of figuring out how to lay everything down on a card. However, making a mini card takes away the pressure of having such a huge blank "canvas" mainly because I can make the card the size of the image! So that's what I've been doing for the past few days. The first card that I made featured this cute robot from the Sandy Lion stamp set that I found on clearance months ago. I love these cutesy images! I colored him in with Copics and Bic Mark-Its. I have to say that I LOVE Copics because of all the lighter colors and how easy it is to blend (although I do need the correct paper to do this), but I do very much appreciate my Ultra Fine Bics because I don't have to worry about the small parts. In actuality, the only thing colored with Copics in terms of this robot is the lightest gray.
The layering was easy to figure out mainly because I had made a mini card like this for Howard a while ago, so I just looked at the picture I took of that one to duplicate for these. It's also super easy to make multiples. I made 8 of this one, and cutting 8 pieces of every color all at once really saves time. No need to figure out size measurements for each card! Figure it out once and cut cut cut! Plus, even something like Corner Chomp-ing takes less time when I do a bunch at once because I keep the tool in a drawer, so I can just chomp it all at once and put it back.
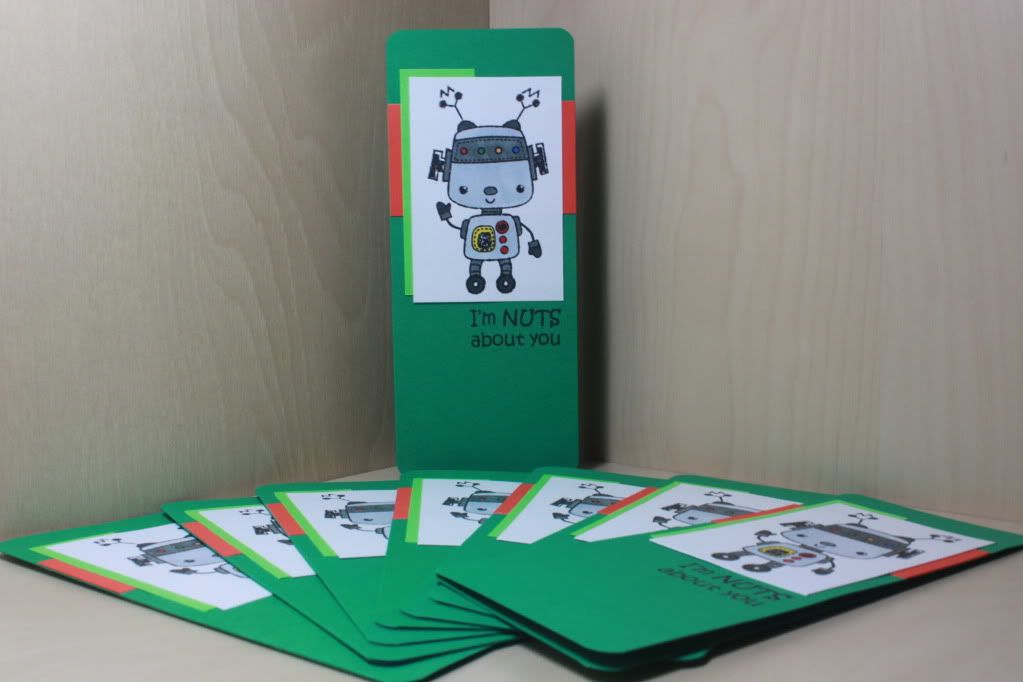
The sentiment is from Pink by Design's "Be Mine" set. When I first saw the sentiment, I immediately thought about squirrels, but I like that it works with nuts and bolts kinda stuff too. I initially was going to sell them for a lot less in my FB store, but mini cards still take the same amount of time as a regular-sized card! Haha, it's just easier working with smaller pieces in terms of cutting (I can use my small Cutterpede, haha yay!). I really liked holding all 8 in my hands afterwards though ... it's fun to be able to get a lot done by making multiples!
Saturday, August 6, 2011
Have a Flock-Filled Christmas!
On Wednesday, I decided to just take a break from being in the house all day long and head out to the craft stores. Okay, it's more like I had a $10 off $25 coupon from AC Moore Rewards and was eager to get some sale items even cheaper! But going out to AC Moore also means going out to Michaels. I mean, you're out using the car anyway, right? Oh, and Marshalls ... hehe. I'm totally digressing ...
As I was slowly making my way up and down the aisles, I came across the little Martha Stewart section and saw that they had flocking on sale for $1.49 a bottle. Hmm, that seems interesting. I decided to pick up one bottle of the "swan" because it was the last one in that color and just to test it out.
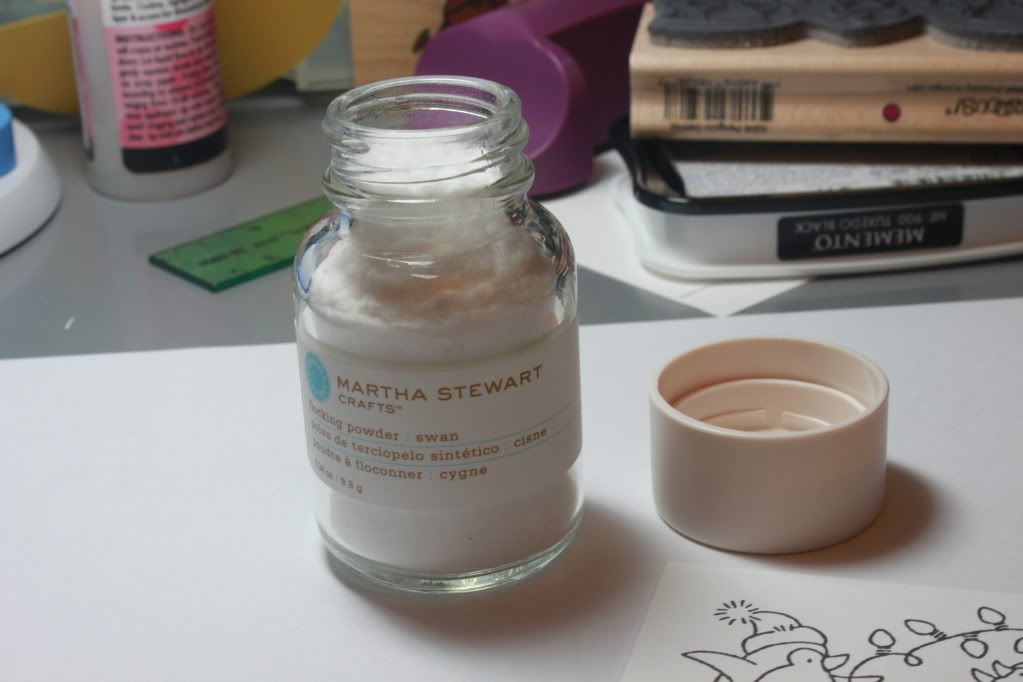
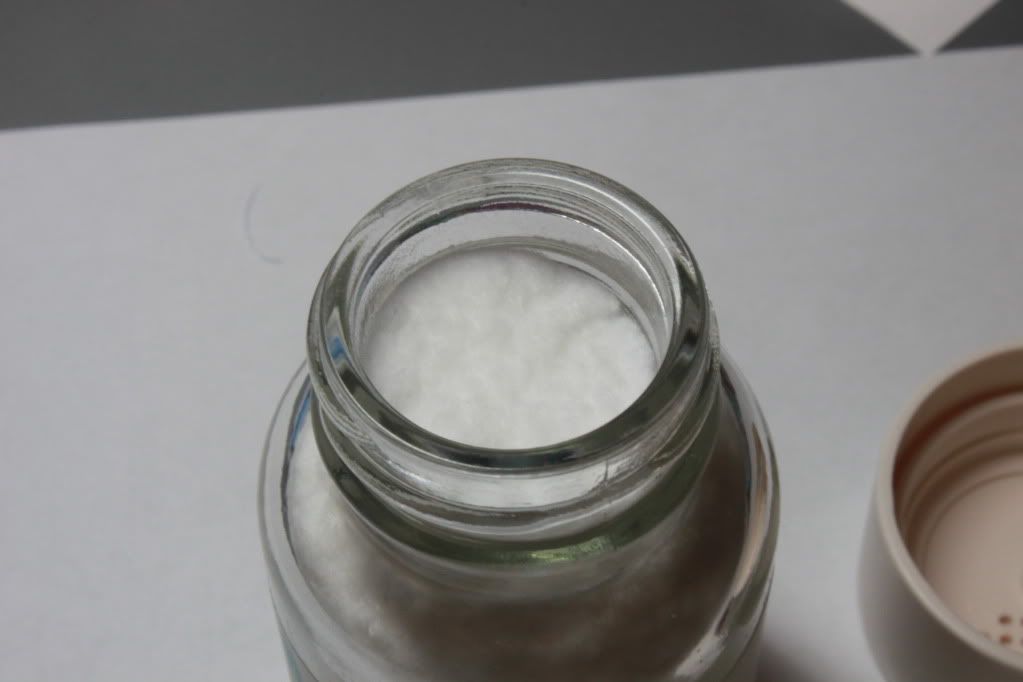
At home, I opened the bottle and was pleasantly surprised to see just how fluffy this stuff really is! I could probably just play with it all day long, but in the same way that glitter would stick and stay everywhere, the little fibers of flocking would do the same! I disregarded the temptation to just pour it all out and have fun, haha.
I stamped and colored a penguin image that I had never used before. I believe it's Stampendous. Then I used my Zig 2-Way Glue pen to put glue on the pom-pom and the brim of the Santa hat.
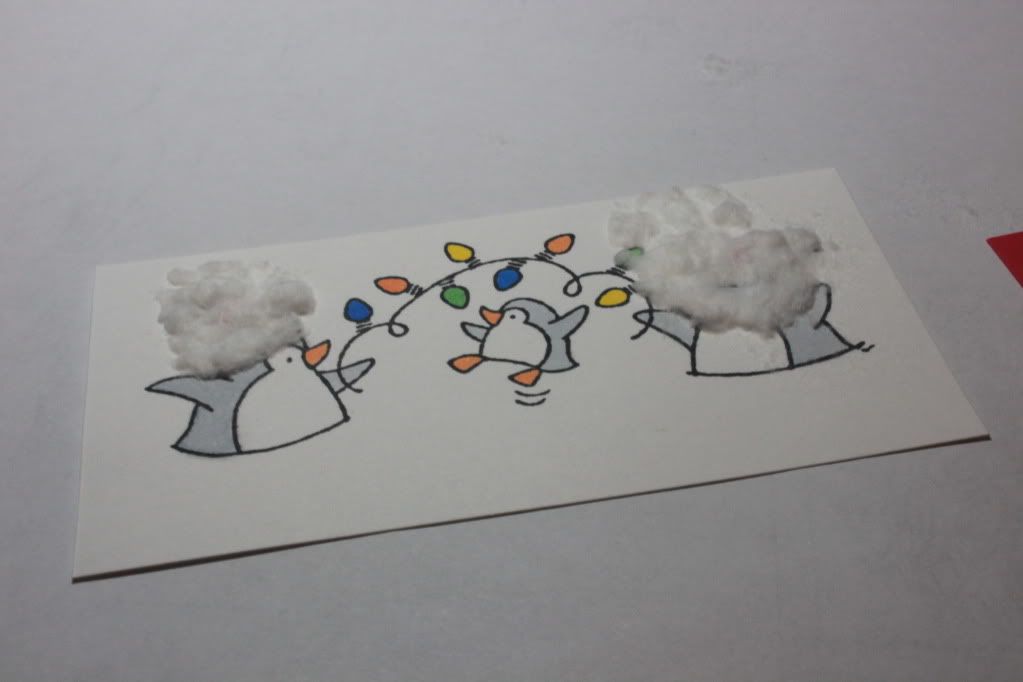
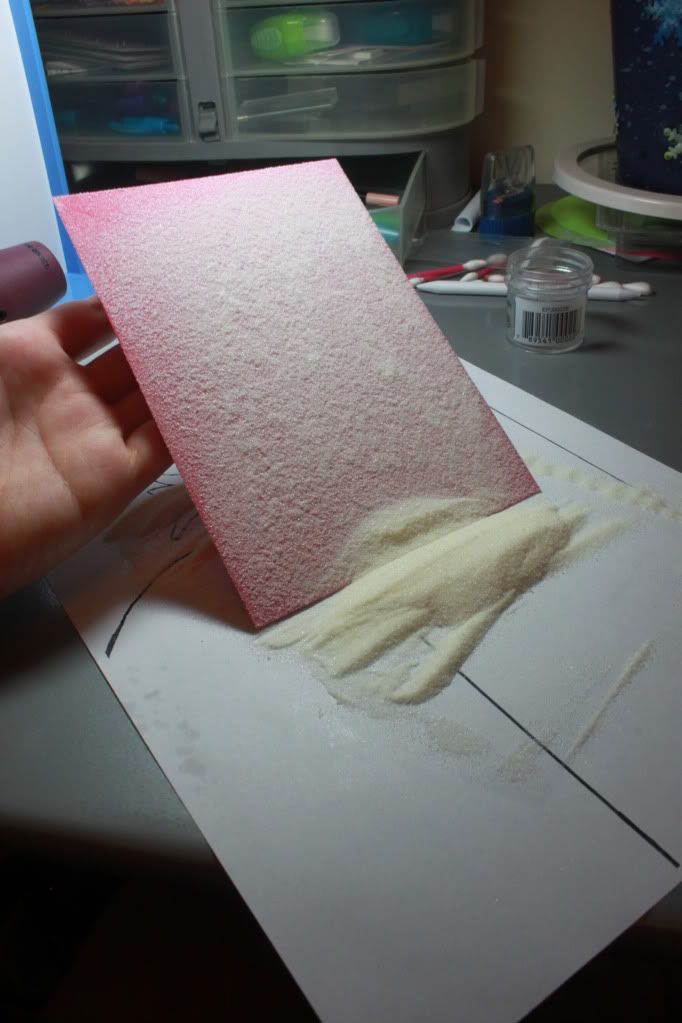
After watching videos on YouTube, I sandwiched it between cardstock and then used the A, B, and C plate to run it through my Cuttlebug.

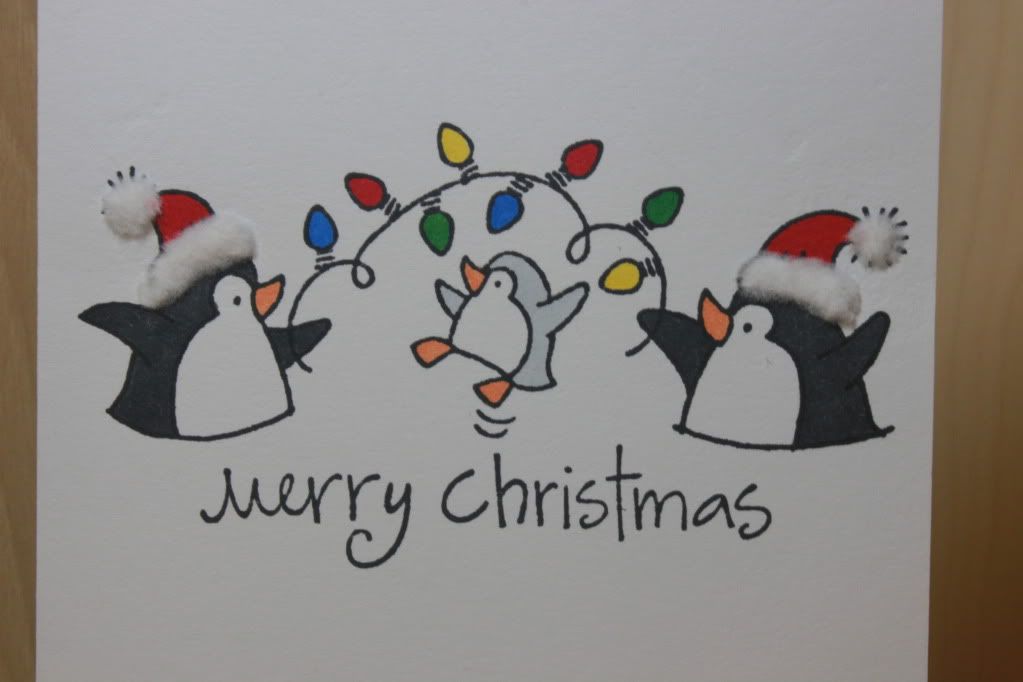
A quick shake (okay, a somewhat rigorous shake) of the cardstock caused the excess flock to fall off, and I was left with this adorable image! Fuzzy hats on those penguins (not sure what's wrong with me; was about to call them pandas ...).
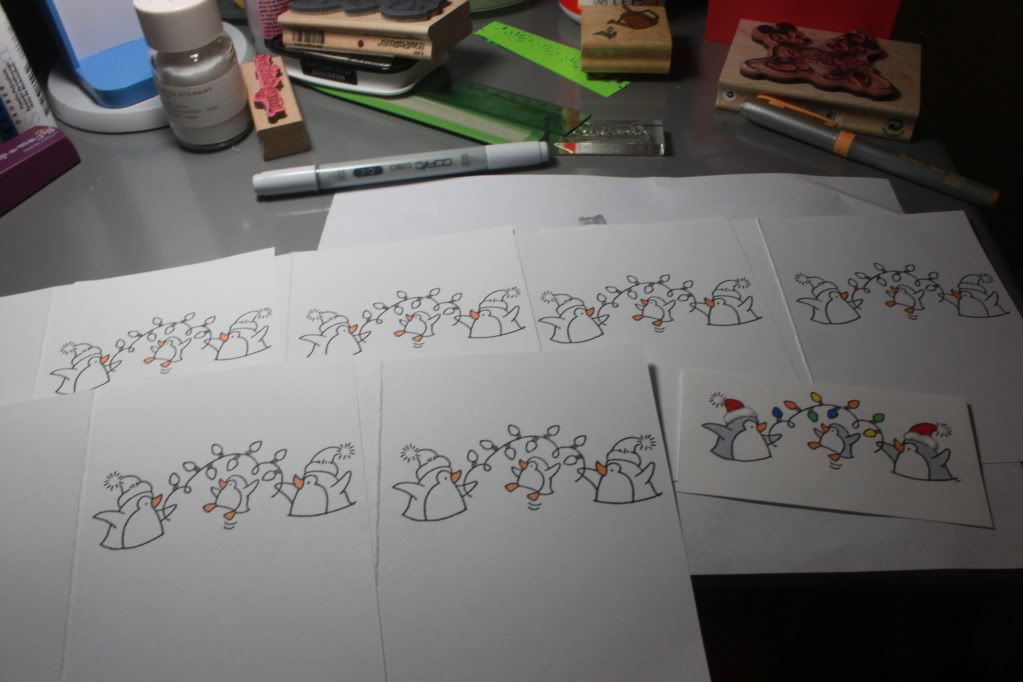
Now that I knew it worked, I was all set to mass produce. I made 6 cards because one of my friends said she'd buy one of every card in my store, so after setting hers aside, I would still have 5 to sell. It's also so much easier to mass produce. As you can see in this picture, I colored the orange in first. There's no need to put the marker down and cap it. Oh, well this all occurs after stamping it neatly on the cardstock. Oh, Memento Ink, how I love thee.
I actually pulled out my lovely Stamp-a-ma-jig so that everything could be aligned correctly since I was stamping it directly on the cardstock. Whoops, you can also see a potential image that MIGHT show on a future card! I used an old $1 stamp that I purchased years ago, and I have to say that now that I've been working with both clear stamps and red rubber, I am seeing why there are those who are insistent on red rubber stamps only. I also understand why some companies make their unmounted stamps on red rubber as well. The image is so crisp and clear. I miss using them! Using the Stamp-a-ma-jig is totally worth the red rubber result.
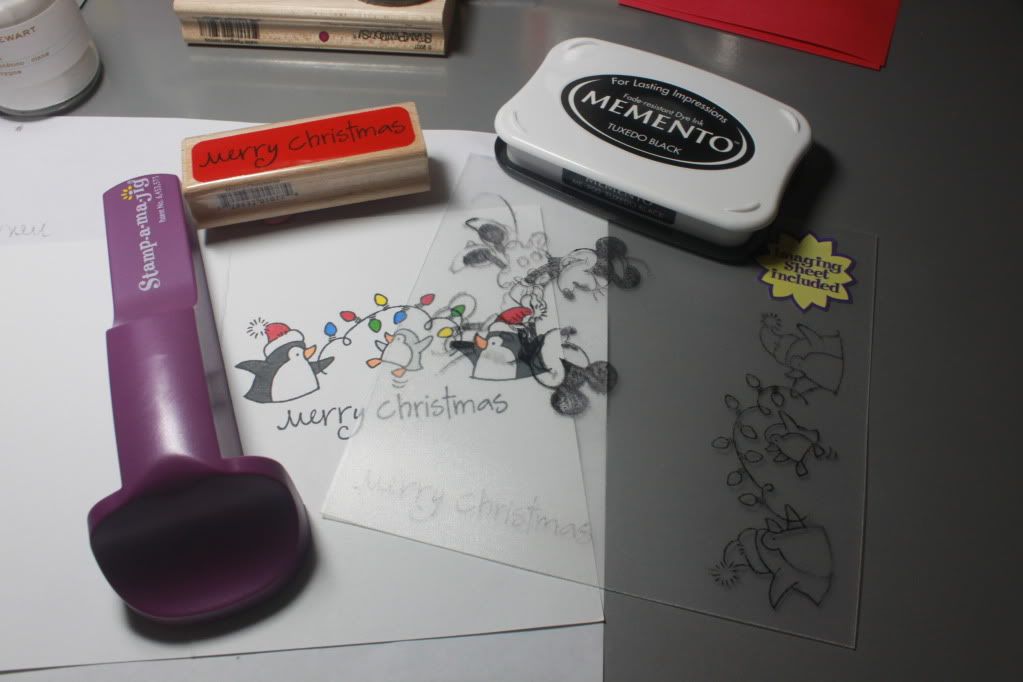
Oh, for those who don't know a bout the Stamp-a-ma-jig, basically you line up that plastic against the corner of the tool that can be used by righties or lefties. Then you stamp the image onto the plastic using the Stamp-a-ma-jig as a guide. Afterwards, you can place the plastic piece anywhere on the card, lining it up in the right spot, and then have the Stamp-a-ma-jig hold its place as you remove the plastic and stamp the actual image. Wow, I thought it'd be a lot easier explaining that with words, but I think I might defer to the lovely people who have made YouTube videos on it.
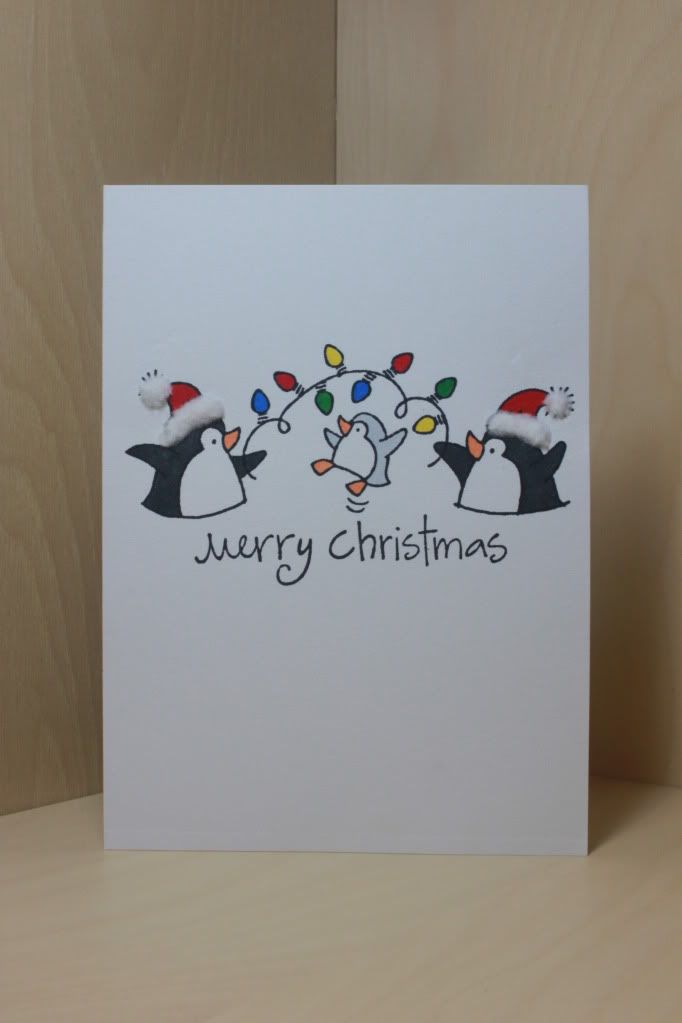
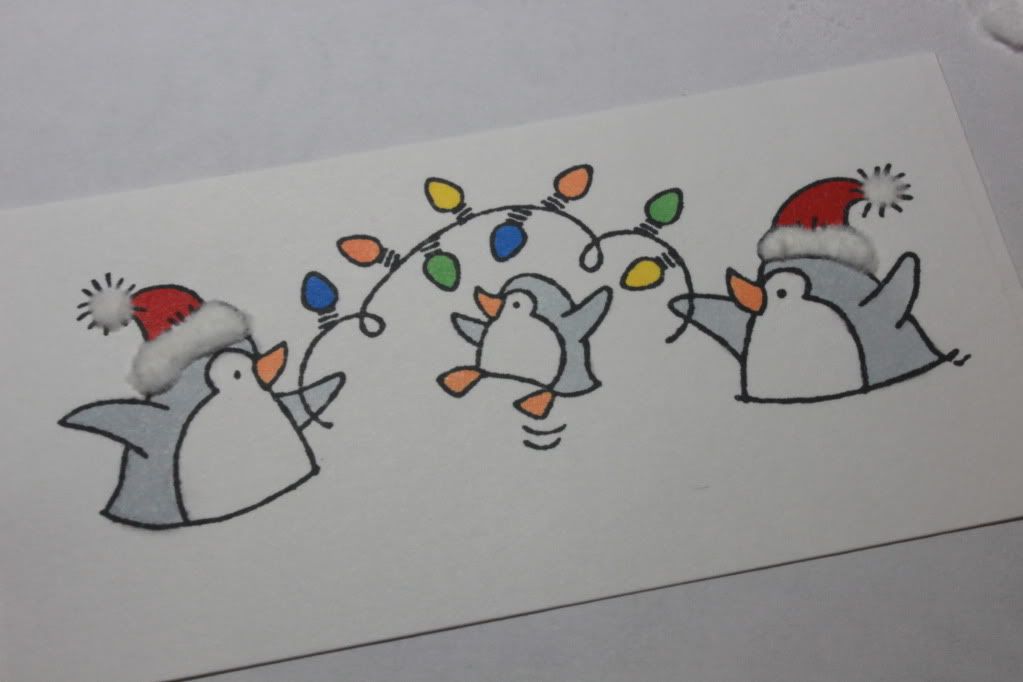
Well, there you have it ... the finished card! I love the stamp itself, but I'm extra pleased with the flocking. I wonder if I could flock some snow on this too. That actually might be a bit easier to do since it doesn't have to be as exact.
Considering how much I enjoyed this, I did go back to Michaels to buy the other 9 colors that they had for clearance. Yup, I now have 10 bottles. I was explaining all of this to Howard yesterday, and he was pretty intrigued. I said that when we're married, I'm going to wake up and find him in the middle of the night flocking everything in sight, even the walls! Haha, that'd be a funny sight.
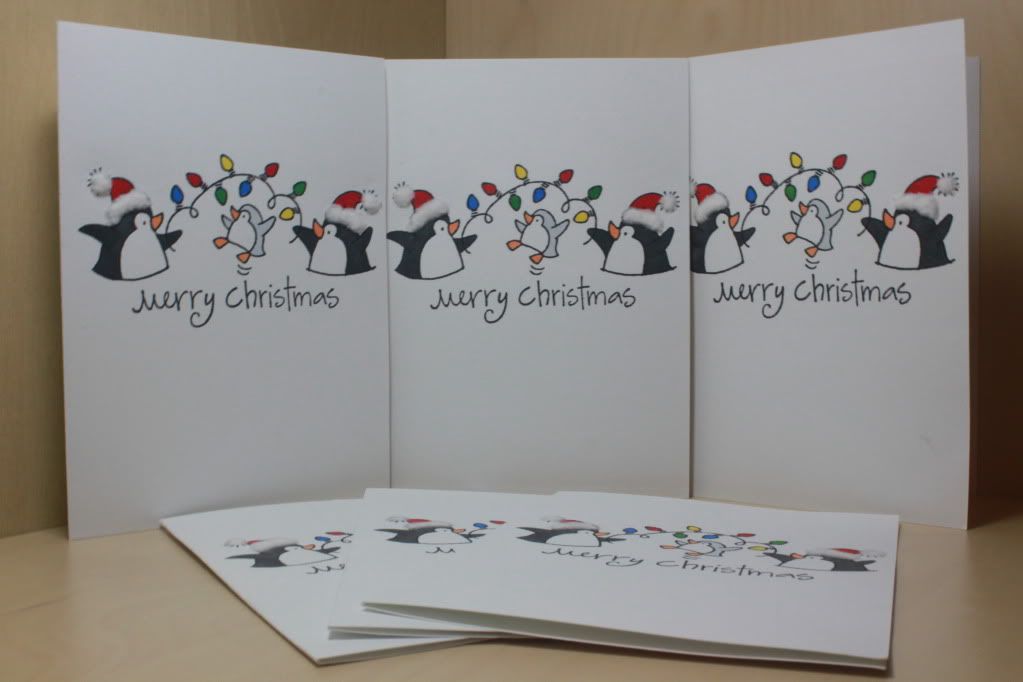
Although I made 6 of them, only 4 of them will be going in the store at the price I had planned. I'll have to discount 2 of them because they didn't come out as nicely as the others. They're not terrible, but I don't want to be selling an inferior product at the same price. I did learn from those 2 cards though! The mistakes I made were as follows: (1) Don't try squishing the flocking with the cardstock to avoid the hassle of the Cuttlebug; it doesn't stick as well or as neatly, and (2) Don't run the plates through the Cuttlebug one way and then back the other way and/or don't use Scotch Quick Dry Adhesive because it's too thick. Live and learn! Hmm, what can I flock in purple ... orange ... blue ... or green?!?
Here is the challenge that I'm entering:
- "Gimme the Bird" (use a bird image on your holiday card or project) at Christmas Stampin' All Year Long [Click the first link to see that I'm linked in at #6]
Friday, August 5, 2011
Failed Technique
I love trying new techniques! When I see a new thing done on someone's card, I start looking at the cost of the materials that are required. One technique that I saw recently was posted on the Pink by Design message board. One of the design team members showed a whole tutorial with pictures about how to do embossed embossing. You can find that thread by clicking here. Her card is absolutely beautiful (minus the Wizard of Oz stuff ... I've been scared of it since I was a kid, haha!).
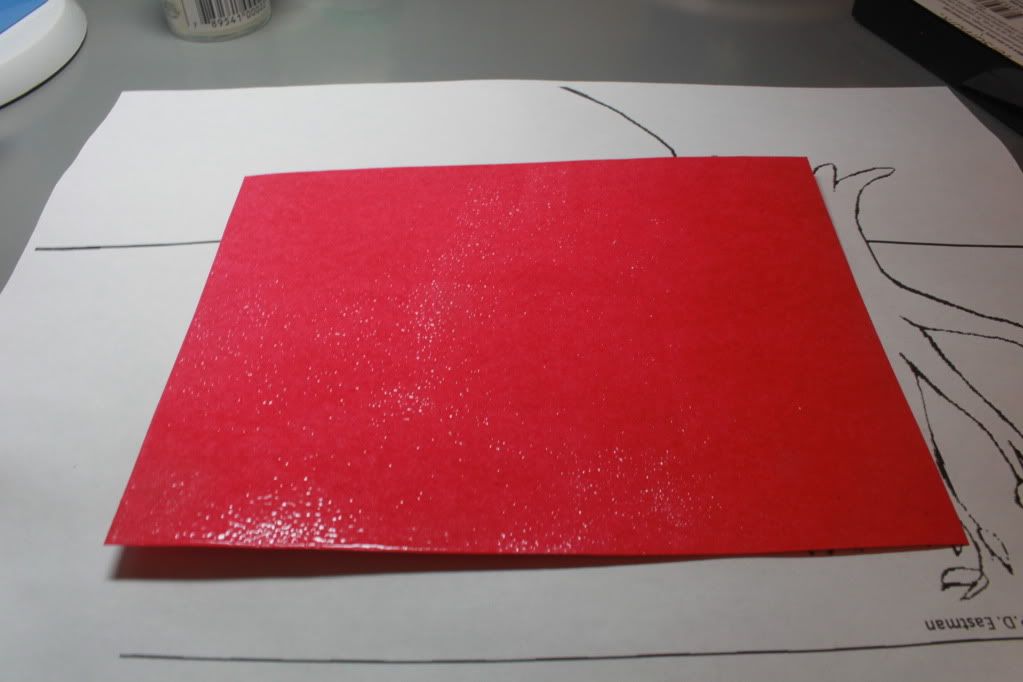
Well, I decided to give it a go a few weeks ago. The first thing I did was use my VersaMark ink pad to ink up my cardstock. Then I poured on the embossing powder.
Well, I decided to give it a go a few weeks ago. The first thing I did was use my VersaMark ink pad to ink up my cardstock. Then I poured on the embossing powder.
I heated the whole thing up so that it would melt, and I was left with this.
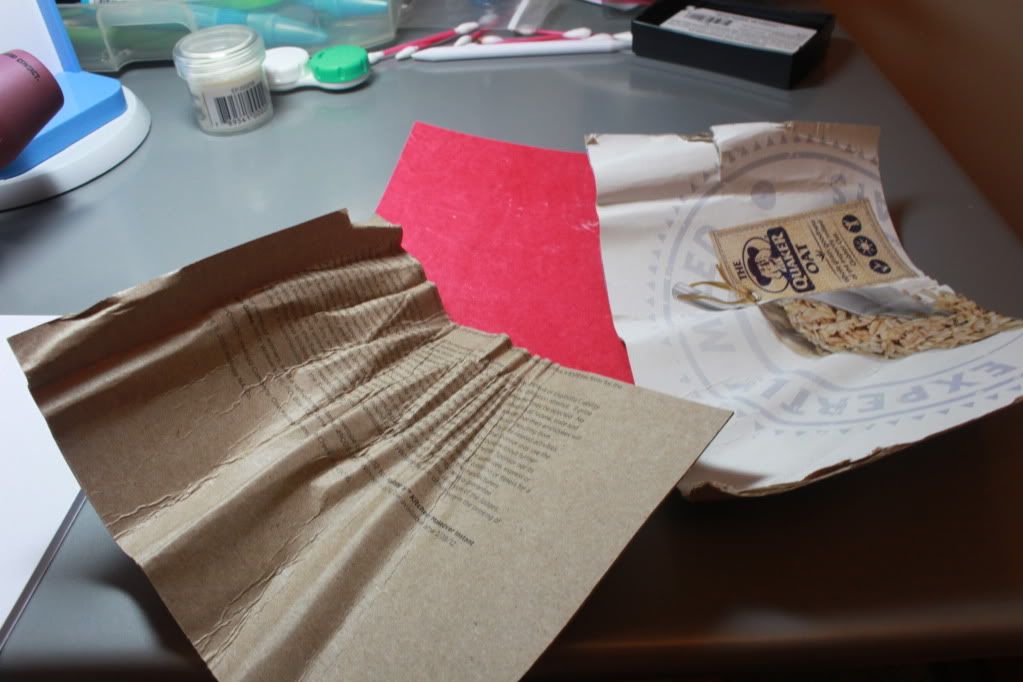
Well, the mistake I was made was that I tried to use a Fiskars plate instead of an embossing folder because I wanted a particular design for the card I had in mind. To use them though, I have to use 2 shims, which are actually just pieces from a cereal box. I've had these pieces since I first got the Fiskars plate and my Cuttlebug months ago. I don't have them anymore though!
I guess the sandwich was much too thick because it actually got stuck IN my Cuttlebug! The cereal box rolled up INTO the rollers of the machine. I was so afraid I wasn't going to be able to get it out, but obviously you can see that I did manage. I had to somehow get my plates out (thankfully without breaking any of them!), and then I rolled backwards to get the pieces out. Haha, I haven't attempted this technique again at this point, but next time, I'm using a good ol' fashioned embossing folder!
Have you ever tried a new technique that just failed?
Thursday, August 4, 2011
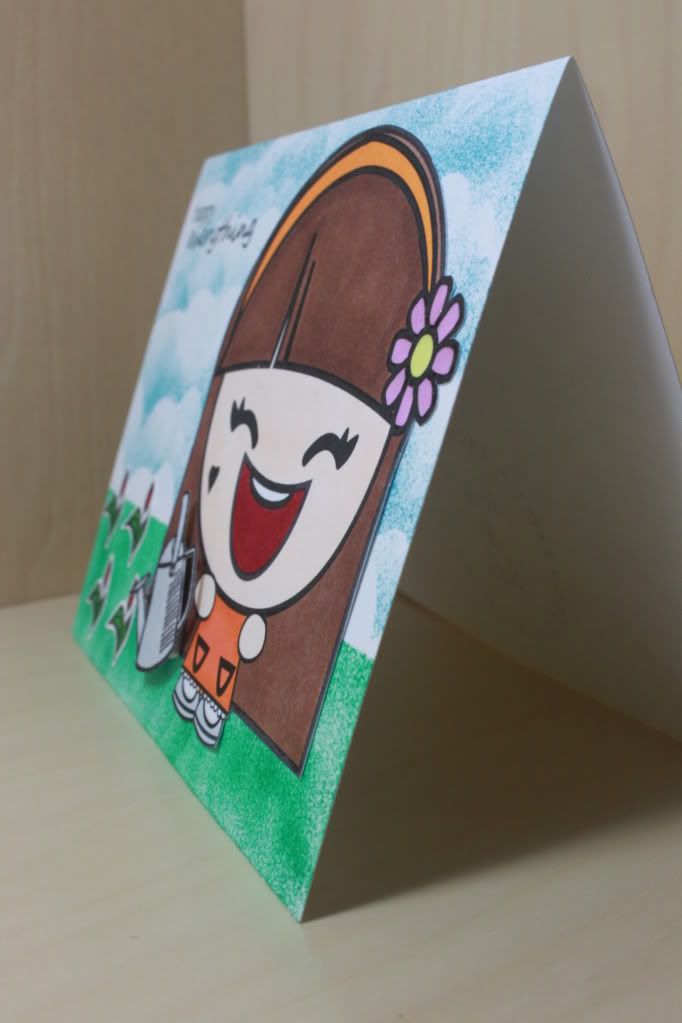
Happy EVERYTHING!
Over the past few days, I've realized that crafting depending on my mood is way more fun than crafting solely for challenges. Though challenges are great when I've lost my "mojo" and don't quite know where to start, I've gotten to the point where I think I know my own personal style and don't care that much to change it (of course, that doesn't mean I don't want to experiment with new techniques!). However, sometimes it just happens to be that what I want to do matches a challenge, and that's what happened today! I was in the mood to work with the Happy Millie digi from Karber.
Since the challenge was to show a hobby or leisure activity, I wanted Millie to hold a watering can to show gardening. I created a little scene on the card by inking the bottom of the card green, and then using that same cloud technique I used on the "Summer Lovin" Grease-esque card, I made the sky. In this picture, you can see how I'm kind of spread all over the place as I'm sure most crafters are! That jar of spongy material is actually from when I crafted YEARS ago. I still had it, and I actually like how it works better than the Inkssentials stuff! Of course, it's probably because I'm not using the tool properly.
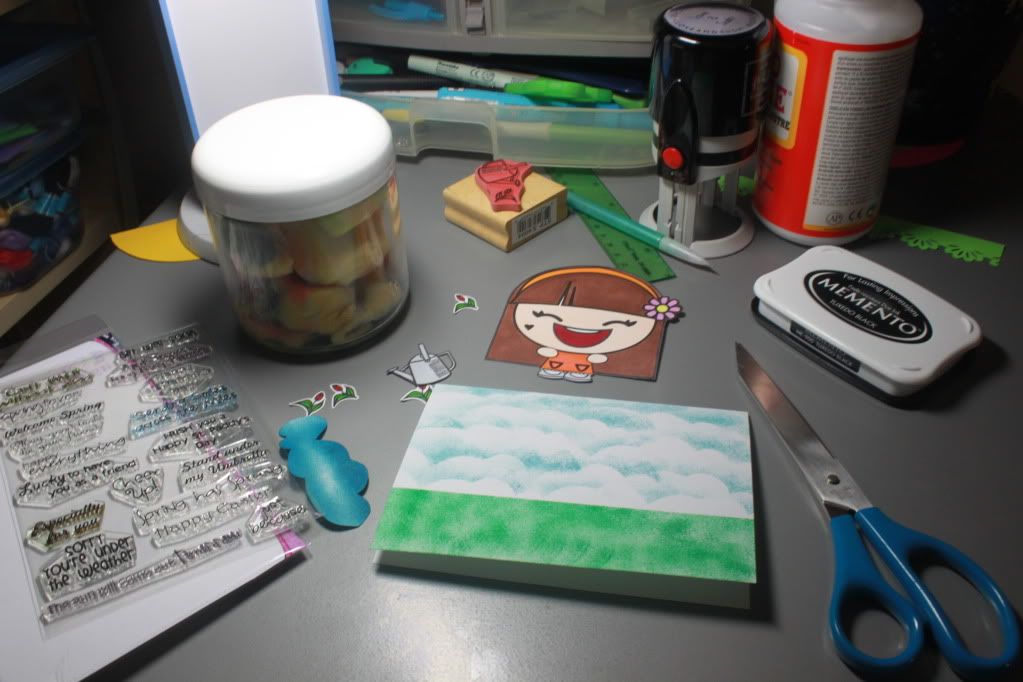
You can see everything ready to be assembled though. All the pieces were cut, and I had the Pink by Design "Spring Has Sprung" set out and ready to use. Oh, and I also switched to Memento! Previously I was using StazOn, but since I bought Copics, I had to get new ink. Let me say that this stuff is amazing. It's so much easier to ink; it really is a "juicy" ink pad! I had read other crafters use that word, and I just didn't get it until now. Before I finish this digression, you can also see my new PSA Essentials stamp that I won from my popsicles card over at CAS-ual Fridays! Woohoo! And the Mod Podge is out from the He"ART" Journal pages I did last night for The Greeting Farm.
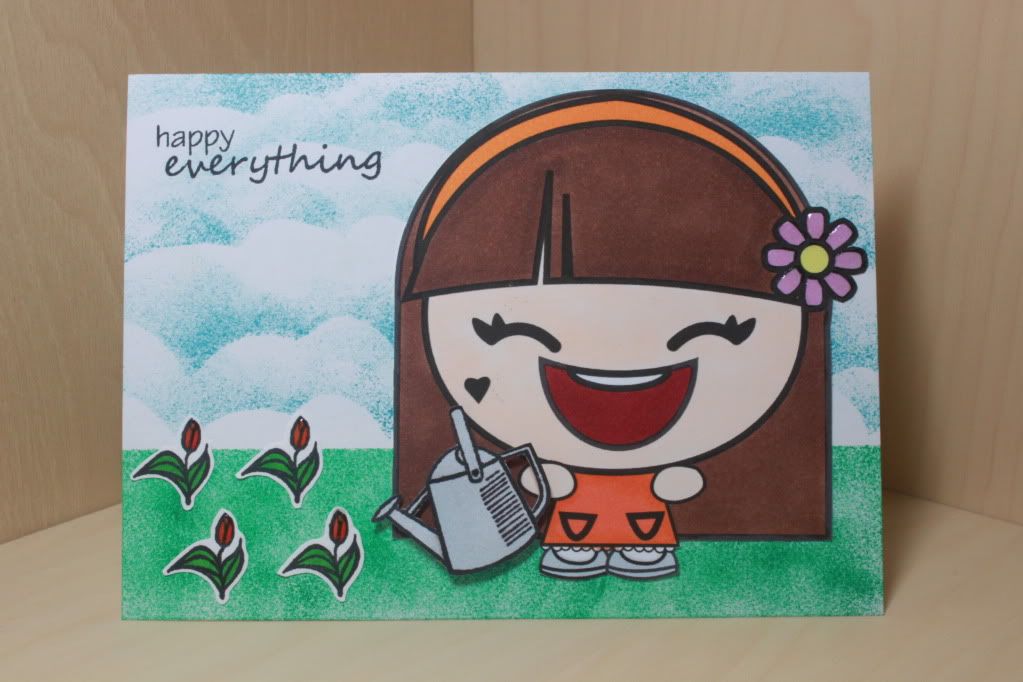
Okay, so that's the finished card! I like how it turned out because I think it's my first "scene" card. Millie looks happy doing just about anything! I was going to use a spring-time sentiment, but since I put this in my Facebook store, I kept it a bit more general. Oh, I also added Glossy Accents to Millie's flower in her hair as well as the red parts of the tulips. And of course, how could I not pop something up on a card? Haha, it's pretty much a given!
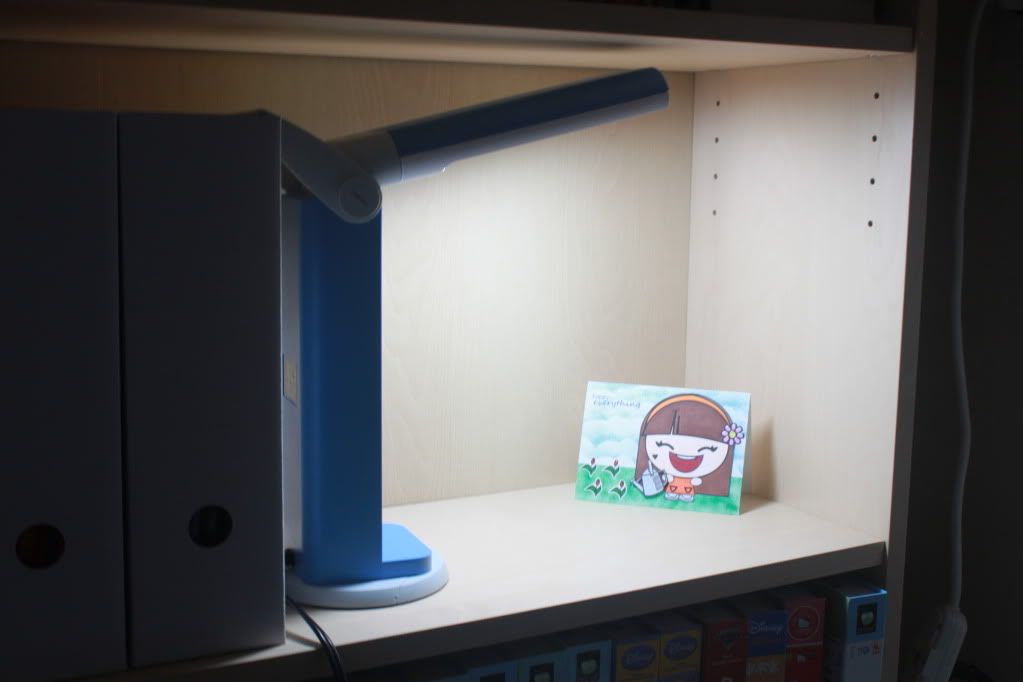
The last picture is just to show you how I've been taking my photos now. Howard really doesn't like the clutter in the back of my previous pictures, and I didn't like how things were still dark even though I was using my Ott-Lite. I tried the bookshelf on the other side of my room that got my direct sunlight, but it's a dark mahogany and wasn't bright enough. Then I realized I could use the bookshelf next to my crafting table. I just have to remove my big card box and eyelet box as well as 2 magazine holders filled with supplies from the shelf, and then I have enough room. What do you think? Haha, it's a lot easier than having a light box that would have to be set up and then taken down each time!
Here is the challenge that I'm entering:
- Karber Challenge 37 (hobby and leisure activities using a Karber stamp) at Karber Challenge [Click the first link to see that I'm linked in at #4]
Wednesday, August 3, 2011
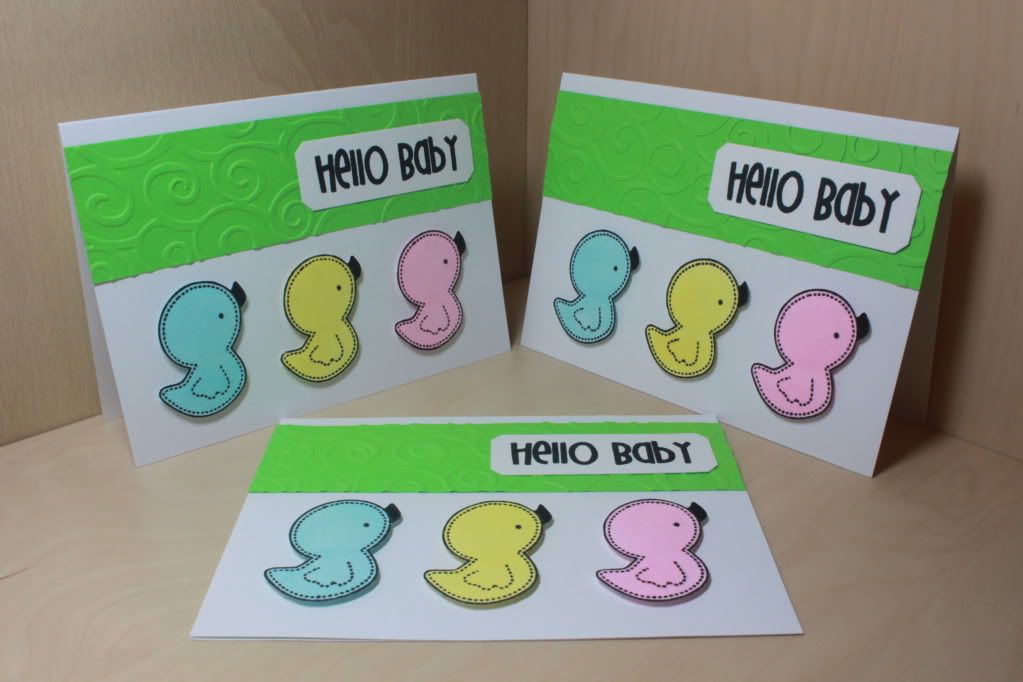
Hello Baby!
Now that I started a Facebook page for my friends and family to purchase cards, I have begun to think about what cards people will need for certain occasions. I immediately thought of a baby card when I saw the cute little duck from the Sandy Lion stamp set I purchased on clearance a few months ago. I'm so glad I bought those 24 Copics before the price increase that started on August 1st. I love my Bic Mark-It markers, but it's really lacking in light colors. I wouldn't have been able to color in these duckies!
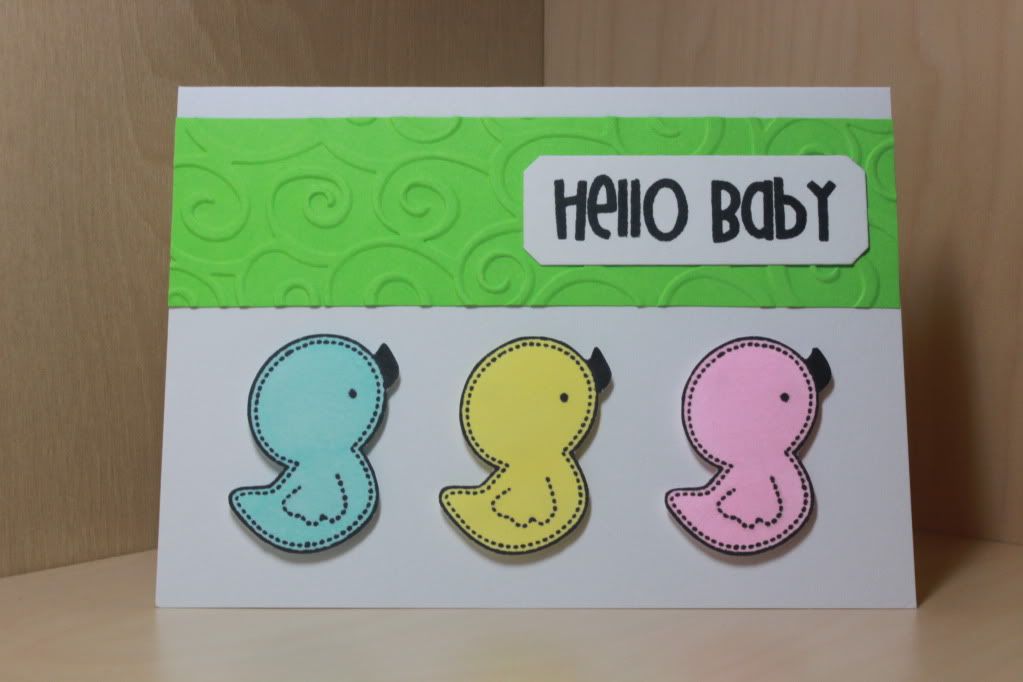
I chose the light blue, yellow, and pink because then this card can work for either a baby boy or a baby girl. The green strip was a bit plain on its own, so I ran it through my Cuttlebug using the D'vine Swirls folder. I used a Papertrey Ink die to cut out the cardstock for the sentiment. The sentiment itself is from Pink by Design's "Big Thoughts" set. They're actually 2 different sentiments, but I put them together so that it wouldn't just say "baby."
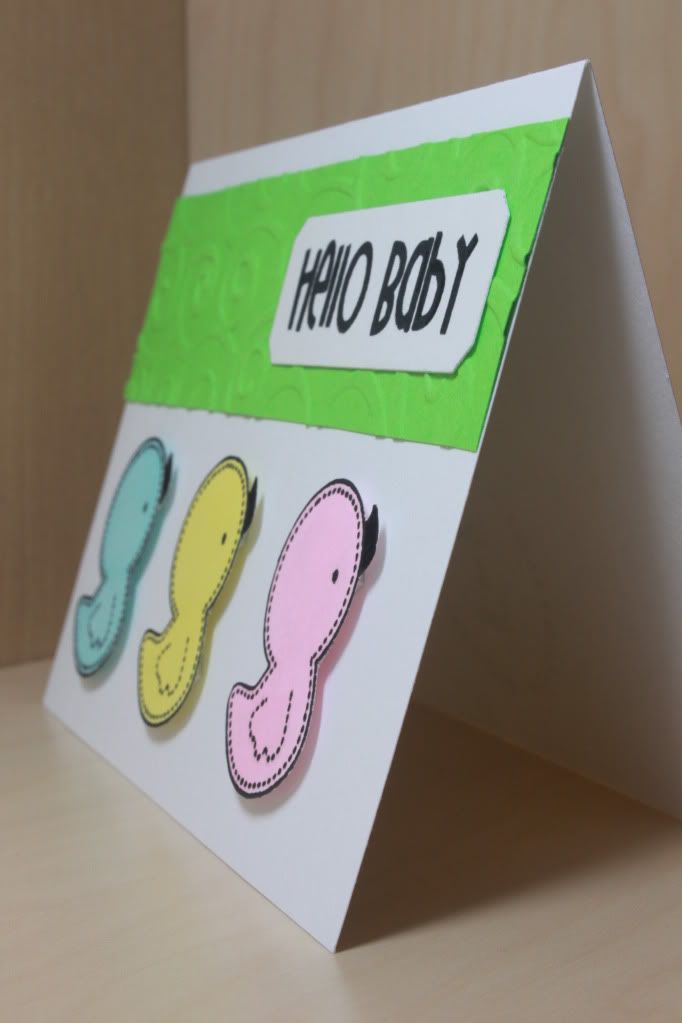
I love popping everything up! It gets rather addicting. Haha, is it just me? I think MOST cards look better with something popped up although I know that's not true for all cards.
Tuesday, August 2, 2011
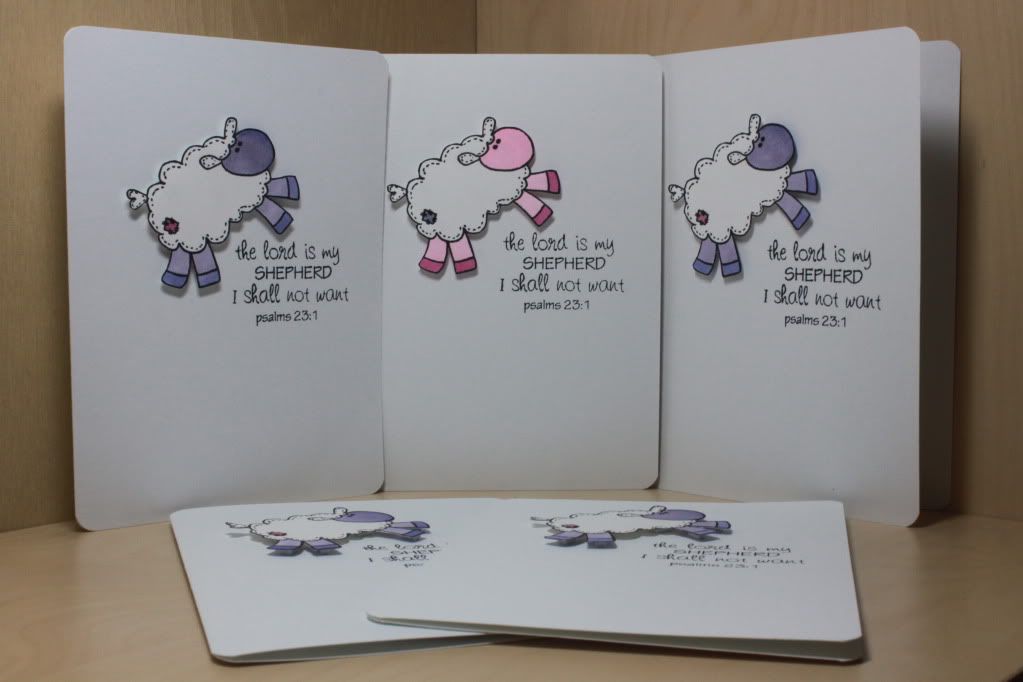
The Lord is My Shepherd
Recently, I decided to dig out my old red rubber stamps to see what fun things I had in there. I haven't used many of them in the longest time, and I knew that there was probably a ton of potential in the many photo boxes I have filled with wooden block stamps. I found this sheep (Inkadinkado) that I have always loved and knew that I could make a clean and simple card with it. I stamped it on cardstock and colored it with Copics. I don't know if you can see it in this picture, but I tried blending. The front of the sheep's head is a bit darker than the rest. Because I don't have the special Paper Trey Ink or Neenah paper that works well with Copics, the colors were bleeding and spreading, so that's why I layered on the edges so it would bleed out instead of in towards the rest of the image. I didn't worry because I was going to "fussy cut" them anyway.
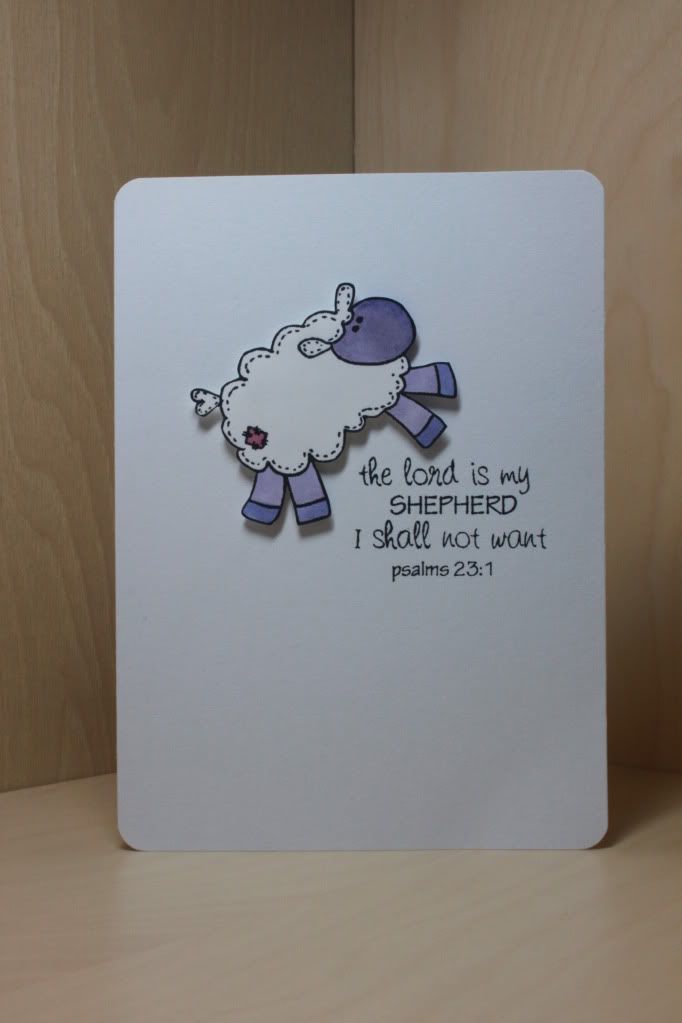
The funny thing is that it took me a very long time to figure out what sentiment to use. I looked at all my sheep sentiments (ex. "It's all about EWE") and tried to figure out if it was a birthday card or what. I then took out the Pink by Design "Faith" set, and tried to see if any of them would fit. Then all of a sudden, I realized that there was the sentiment for Psalm 23:1! I can't believe that I hadn't noticed it before! Haha, how silly of me! It just worked PERFECTLY for this card. I rounded the corners to create a softer look, and I also added a dab of Glossy Accents to the patch on the sheep's wool.
By the way, what do you think of my new picture taking area? It's actually one of the shelves of my Billy bookcase from IKEA. I like the cleaner look of it (as does Howard because he doesn't like clutter in the background at all). It was still bright out when I took it, but there was no direct sunlight on it, so I used my Ott-Lite also. Hopefully, it's better than my previous pictures! Always room for improvement, right?
Here is the challenge that I'm entering:
- Freestyle! - Challenge #5 (any paper project) at Hiding in My Craft Room [Click the first link to see that I'm linked in at #8]
Subscribe to:
Posts (Atom)